Monday, 30 September 2013

How to: Triangular Cut Out Necklace

Rewritable CDs are annoying - you know the kind, you burn some stuff onto them and then when you need to rewrite it, you just can't (or this might just be me being computer illiterate again). Anyway, I'm left with loads of useless CDs that are useless to me as they are, but I can't bring myself to bin them all. This is a project I came up with to use up some old CDs.


Experiment with your design to come up with different patterns - the CD's iridescent colours look beautiful in pretty much any layout.


You Will Need:


  • An old CD
  • Felt (I used black, but you could use any colour)
  • Scissors
  • Glue
  • Necklace chain
  • Needle and thread

Firstly, cut up your CD into triangles. Mine measured about 2cm in height, but you could make yours bigger or smaller depending on the pattern you wanted to make.


Glue these pieces shiny side up onto some felt, and when dry, cut around the felt leaving a border of about 0.5cm. Arrange these pieces into a pattern you are happy with, and using a needle and thread, sew the pieces together.


This is the wrong side, just to show the points where I sewed the pieces together.

When all of your pieces are sewn together, sew your triangle motif onto the necklace chain in the same manner.


Aaaand you're done! Try out different layouts and shapes - I've gone for a triangular motif here, but I rather fancy trying to make a collar shape out of two of these triangles. You could even make different shapes when cutting up your CD - just try a variety of different things to come up with your own unique design.


Let me know if you try this and what design you end up with. Any other up-cycled CD project ideas?


Friday, 27 September 2013

How to: Vintage Picture Domino Brooch

I picked up this set of picture dominoes from a local car boot sale this year (you know summer's over when car boot season draws to a close). I got them in a bag with a couple of other vintage board games for £1 - it felt like a crime to leave them there for that price!


Vintage Rhyming Domino Game
Rhymo dominoes... like a ye olde Candy Crush!
 
I've been holding on for these for a while, waiting for the right idea to present itself. The size was a little hard to work with, so I've decided to split them in two and make brooches out of them.


Cat Picture Domino Brooch
Matching your brooch to your cardigan is optional!

Here's how I did it:

You Will Need:


Picture Domino, brooch back, cutting knife, ruler, glue gun


  • A picture domino (each domino will make two brooches)
  • Brooch back
  • Craft Knife
  • Cutting Mat
  • Ruler
  • Glue
  • Varnish (optional)


First up, carefully split your domino in half using the craft knife. Follow the line separating the two pictures.


Use a craft knife across the domino


Picture domino split in two


Now glue the brooch back to the back of your domino, at the top.


Glue a broock back to the top of the back of your domino


After this, I'd recommend varnishing the front of your brooch. This is optional, but gives your brooch a nice shine and protects it from damage. Wait to dry, and you're done!


ROCK ON! Oh, the irony...

What was your best car boot find of the year? I'd love to see pictures if anybody tries this!

Wednesday, 25 September 2013

Free Amigurumi Pattern: Mini Panda

It's no secret that I love pandas, so I thought it was about time a panda themed project featured here. So, here's an amigurumi pattern that I wrote ages ago. It wasn't the first crochet pattern I'd ever written, but it was probably the first one that actually went as planned (it didn't end up falling apart or looking a bit creepy). I've used a minty green instead of the more traditional black, but use any colour you like (you could even make lots in many different colours for a panda army).

mini amigurumi crochet panda


It's really simple, so don't be put off if you haven't crocheted before - all you need to know is double crochet and increasing and decreasing. There isn't too much sewing up either as the head and body are worked as one piece. Just to let you know, I'll be using the English crochet terms (just to make things confusing, American patterns have different terms for different stitches). Ready? Lets go!

You Will Need:

  • 25g White DK Wool
  • 25g Green DK Wool
  • Black Wool/ Embroidery thread
  • Toy Stuffing
Abbreviations:

  • Ch = Chain
  • Dc = Double crochet
  • St = stitch
  • Dc2tog = Double crochet 2 stitches together

Body (Make 1)

ch 2
5dc in second ch from hook
R1: 2dc in each st (10)
R2-R5: dc around (10)
NOTE: at this point, it can be quite useful to stuff this thinner part of the body.
R6: 2dc in each st (20)
R7: *1 dc in first st, 2dc in next st* repeat 10 times (30)
R8-R9: dc around (30)
R10: *1dc in first st, dc2tog* repeat 10 times (20)
R11:"dc2tog* repeat 10 times (10)
Stuff the rest of the body/head before closing up:
R12: *dc2tog* repeat 5 times (5)
R13: *miss 1st, dc in next st* repeat until hole is closed

Arms (Make 2)

ch2
3dc in 2nd ch from hook
dc around until arm measures 3cm
Sew the arms in place to the body, just below the head.

Legs (Make 2)

ch2
3dc in 2nd ch from hook
dc around until leg measures 2.5 cm long
Sew the legs in place, at the base of the body.


Ears (Make 2)

ch2
3dc in 2nd ch from hook, ch1 and turn
2dc in each st
Fasten off and sew in place either side of the head

Eye Patches (Make 2)

ch2
3dc in 2nd ch from hook
2dc in each st
Fasten off and sew in place on the head, where you want the eyes to be.

Finishing Off

Using black wool or embroidery thread, sew some eyes and a nose and mouth on your pandas face. There are no rules for this, so give him any expression you like (just make sure it looks mega-cute!). Your final panda will measure about 8cm tall, so carry him in your coat pocket to keep you company.

Let me know if you try this, and if you have any questions (or spot a mistake!) about the pattern, please leave me a comment!

Tuesday, 24 September 2013

The Autumn Hitlist


While I've been distracted by all the lovely Spring/Summer clothes at LFW, the temperature has dropped and the nights are drawing in. Which can mean only one thing - time for a change in wardrobe! Here's my pick of the hottest trends this Autumn/Winter:

1. Tartan


Source
Tartan is EVERYWHERE at the moment, and I think it's probably one of those things you either love or hate (me? I love it!). There's so many different ways to wear it though - so don't be put off if a huge tartan coat or skirt just isn't you. My favourite way to wear it is accessories - especially shoes (at the moment I'm living in my tartan print Converse). This backpack from Next is practical as well - bonus!


2. Heritage


Source


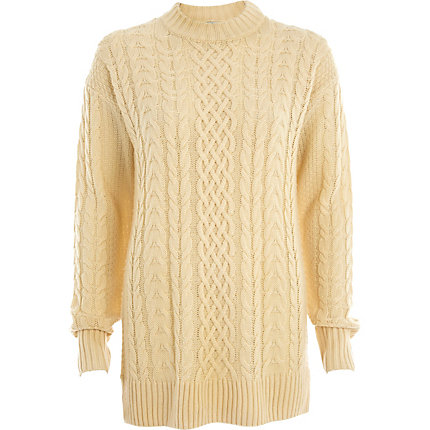
Heritage always rears it's head this time of year - think faux fur, animal motifs, trench coats and tweed (stately home not required). If it's inspired by the British countryside - spot on! A big, chunky jumper is vital for this look - simply pair it with some skinny jeans and some utilitarian boots for countryside chic!


 3. Preppy Layers


Source
 This is one of those trends which is amazingly practical. For a preppy layer, just wear a shirt underneath a dress, jumper or top. It's also lovely and cosy too. Who said being warm couldn't look fabulous? Look out for plain shirts you can wear with pretty much anything, or a patterned shirt to add a quirky pop to a minimal jumper. Too warm to wear a shirt AND a jumper? Why not make a detachable collar (trust me, it's simple)?


 4. The Tube Skirt


Pencil Skirt
Source


 More suitable for those rare, warmer winter days, the tube skirt should ideally fall just below your knee and be made from a lovely, soft jersey fabric. Apart from being INCREDIBLY comfy (elastic waist = more fun) the main attraction here is versatility. Wear with a leather jacket and Converse for a casual look, wear with ballet pumps and a fluffy jumper or go all out and wear it with an kick-ass pair of heels. Choose one in a colour that compliments the majority of your wardrobe and you'll find hundreds of ways to wear it.


 5. Leather

Image 1 of Just Female Sweat Dress With Faux Leather


My leather jacket is perfect for this time of year - it bridges the gap between no-coat weather and huge-coat weather. Leather seems to be branching out though and making it's way onto other pieces of clothing - leather skirts, dresses and trousers. I particularly like pieces of clothing with just a leather accent - a leather collar or pockets or edging, it gives clothes a luxurious feel. If you had leather scraps or offcuts you could easily experiment with adding a touch of leather to an otherwise plain top.


Ah, all these trends almost make me glad it's going colder. What are you looking forward to wearing this Autumn/Winter?

Saturday, 21 September 2013

How to: 5 Ways to Upcycle Clip On Earrings

I used to come across very pretty vintage clip-on earrings and be put off buying them - I was unsure on what I could do with them. One day I came across a pair so lovely that I bit the bullet and bought them. Since that one pair, I haven't looked back. For those of you who might be put off buying clip-on earrings, here's my five favourite ways to upcycle them:


1. Make a Pendant:


This works best with the dangly types of clip-ons, but some other types might work too. Using pliers, remove the earring from the clip-on back and attach to a necklace or bracelet with a jump ring - easy!


The cupid charm here started life as a clip-on earring.


2. Use them as Collar Clips:


Choose a pair with a clip-back and simply clip them onto your collar tips. This works best with pairs with a sturdy back, so they won't fall off your collar.


3. Update the Ear Fastenings:


You can do this with both dangly and flat back clip-ons. It means you can wear clip-on earrings just like normal earrings. With the flat backed ones, carefully remove the clip-on back using a pair of pliers. Be careful when doing this so you don't damage the part you want to reuse. Then glue an earring post onto the back of the earring, where the clip used to be. I did this with the two pairs in the picture above, both lovely e-bay finds.


With dangly pairs, simply use a pair of pliers to remove the old clip-on fastening with dangly earring posts. Simples!

4. Pimp Your Shoes!


Keep your clip-on earrings as they are and clip into place on a pair of shoes that you fancy hamming up. You can make the change more permanent by sewing or gluing the earrings in place, but I like to interchange mine depending on what I'm wearing.


5. Use them as Ear Cuffs:


When you take apart a dangly pair of clip on earrings, you'll be left with these - the clip-on parts. Before throwing them out - STOP! They make great ear cuffs. Simply clip into place where you want them to be on your ear.


I hope I've inspired you to view clip-on earrings in a different light. Any other ideas on how to reuse clip-on earrings?

Friday, 20 September 2013

How to: Make Plastic Animal Charms

I love anything that can be described as miniature, plastic tat. You know the kind of crap that falls out of really cheap Christmas crackers? Yup, that's the stuff I love. The fun shapes, bright colours and dinky size - whenever I see anything like that I have to have it, because I know I will end up using it for some project or other. My absolute favourite thing to come across is a cheap, plastic, miniature animals, because I love to make necklaces out of them.


This is so easy, yet the results are really striking, probably because every necklace is unique, depending on the plastic animal you choose. The poorer the quality of your plastic animal the better, because actually the plastic is softer to screw or drill through, although I have managed to do this with plastic animals that are rock solid.


You Will Need:

  • A Plastic Animal
  • Jump Screw
  • Pliers
  • Necklace
  • Jump Ring


Take your jump screw, and using your pliers, gently push it into the centre of your animal's back (or wherever you want the animal to hang from). Using the pliers, screw the jump screw in until only the loop part is showing. If you have a miniature drill you could use this to make a hole first and then screw your jump screw in (although I am the weakest person ever, so if I can do this sans drill, I'm pretty sure you can!).


Using a jump ring, attach your animal to your necklace.


Wowsers, wasn't that quick and easy!?


I like to make necklaces out of mine, but you could follow these same steps to make a charm for a bracelet, or if you have two of the same animal, you could make earrings.


I'd love to see if any of you guys try this! What animal would you use?

Thursday, 19 September 2013

How to: Make a Detachable Collar

I've had a bit of an argument with this shirt:


When I bought it, it promised me easy Francophile style, and I loved that the striped pattern looked a little like airmail envelopes. 


However, I've worn it once, and on this occasion I discovered that it was made from a material that resembled a waterproof jacket (although a waterproof shirt might be useful with all the rain at the moment). As a result, I have fallen out of love with this shirt, and have only been holding onto it for so long because I love the pattern on it. So I decided today to take action and find a way to reuse it somehow.


Jasper Conran at LFW - Source: Vogue
I took my inspiration from Jasper Conran at LFW, and decided to make a detachable collar. I love layering tops and dresses over a shirt, but sometimes it just isn't practical - a shirt can sometimes be too bulky under certain things (not to mention it can get quite warm with all those layers!). So a detachable collar seems to be the obvious solution.


You Will Need:

  • An old shirt
  • A pair of scissors
  • Needle and thread
  • Hook and eye fastening


First, lay down your shirt so that your collar is completely flat.


Find the row of stitching that connects the shirt to the collar, and using sharp scissors, cut just below this, so that the collar will not fray.


Position your collar in the way that it will lie when it is worn. It is useful to do this so that you can tell where to position your fasteners.


Sew the hook and eye fasteners on to the top two corners of the collar.


Then you're done! Iron your collar if necessary, and wear it with preppy pride.


You could decorate your collar further by using ribbon, sequins, applique - use your imagination and go wild!
Keep your eyes peeled for future projects featuring the remnants of my Francophile shirt. Has anybody else got any other ways of recycling an old shirt?