Tuesday 25 February 2014

Wrap up in Wolves with Antonio Marras

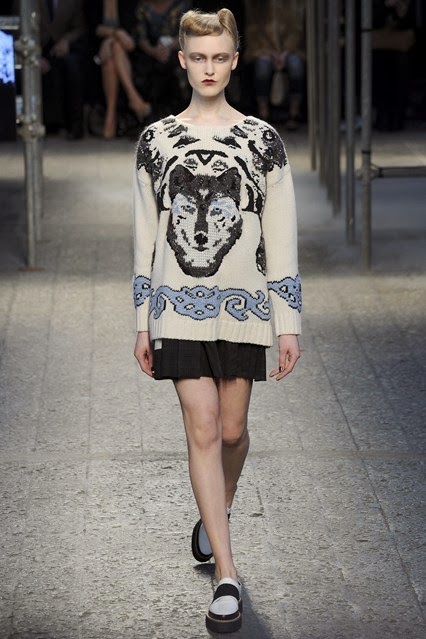
It's no secret that I love a good animal motif, so it's no surprise that the Antonio Marras show at Milan Fashion Week caught my eye. Actually, I don't usually keep up to date with many fashion shows that happen outside of LFW, but when I saw a couple of pictures from the show, I knew I had to investigate further. Pretty much everything from the show is right up my street; a dark colour palette, lace, embroidered flowers, bulky knitwear, but most important were the wolf motifs that ran throughout the entire collection.

All photos from Vogue.co.uk

Antonio Marras Wolf Milan Fashion Week

I love how oversized this jumper is - perfect for midwinter, si? I also really like the Navajo feel to this jumper, but I doubt it would be something I could carry off on a trip to buy some milk. Want to make one yourself? This is knitted, but if, like me, you're not a fan of crazy amounts of intarsia, I would simply intarsia in the main sections, like the wolf, and embroider in the rest. I'd pick a fairly standard roll neck knitting jumper pattern to begin with, and then chart out my design on graph paper. Not a project for the weak of heart. 

Antonio Marras Wolf Milan Fashion Week

In contrast to the above jumper, I think this jacket has a more Oriental feel. Loving the symmetry too. You could take this idea and translate it easily to a dress, a top or a t-shirt. There are a few ways you could recreate this look. Are you fairly artistic? How about using some fabric paint to paint some wolves onto the top or dress of your choice. I think it would look particularly nice on silk. An easier and lazier way to get the same look would be to use photo transfer paper. Simply find a photo of wolves you like, print onto your paper and then iron over the paper to transfer your image. Simples!

Antonio Marras Wolf Milan Fashion Week

This is my favourite look from the whole show. This jumper is a statement piece without being too much, and I can imagine this working great off the catwalk too. I've never knitted a jumper before, but desperately want to do so, and this might be the photo that gets me started. Who knows - if I start now, maybe it will be finished in time for next winter? The jumper itself is a fairly standard shaped jumper, so the hardest part would be designing the intarsia motif on graph paper. Wish me luck! 


Have you ever designed your own intarsia motifs for knitting? Any advice?

Monday 24 February 2014

How to: Decorate a Clock with Washi Tape

Washi tape is my new favourite thing. Had you asked me a year ago what it was, I probably would have been stumped. Washi tape? A tape to help with the washing? But once you get the idea that it's basically masking tape with cute patterns printed on, you can see the allure of it. I am a stationary fiend anyway, so any new kind of pretty stationary is fine by me. Washi tape has so much potential that once you buy a roll, you keep finding new ways to use it. It originates from Japan, so used to be quite hard to find in the UK, but now it's popping up all over the place.
Washi Tape Collection

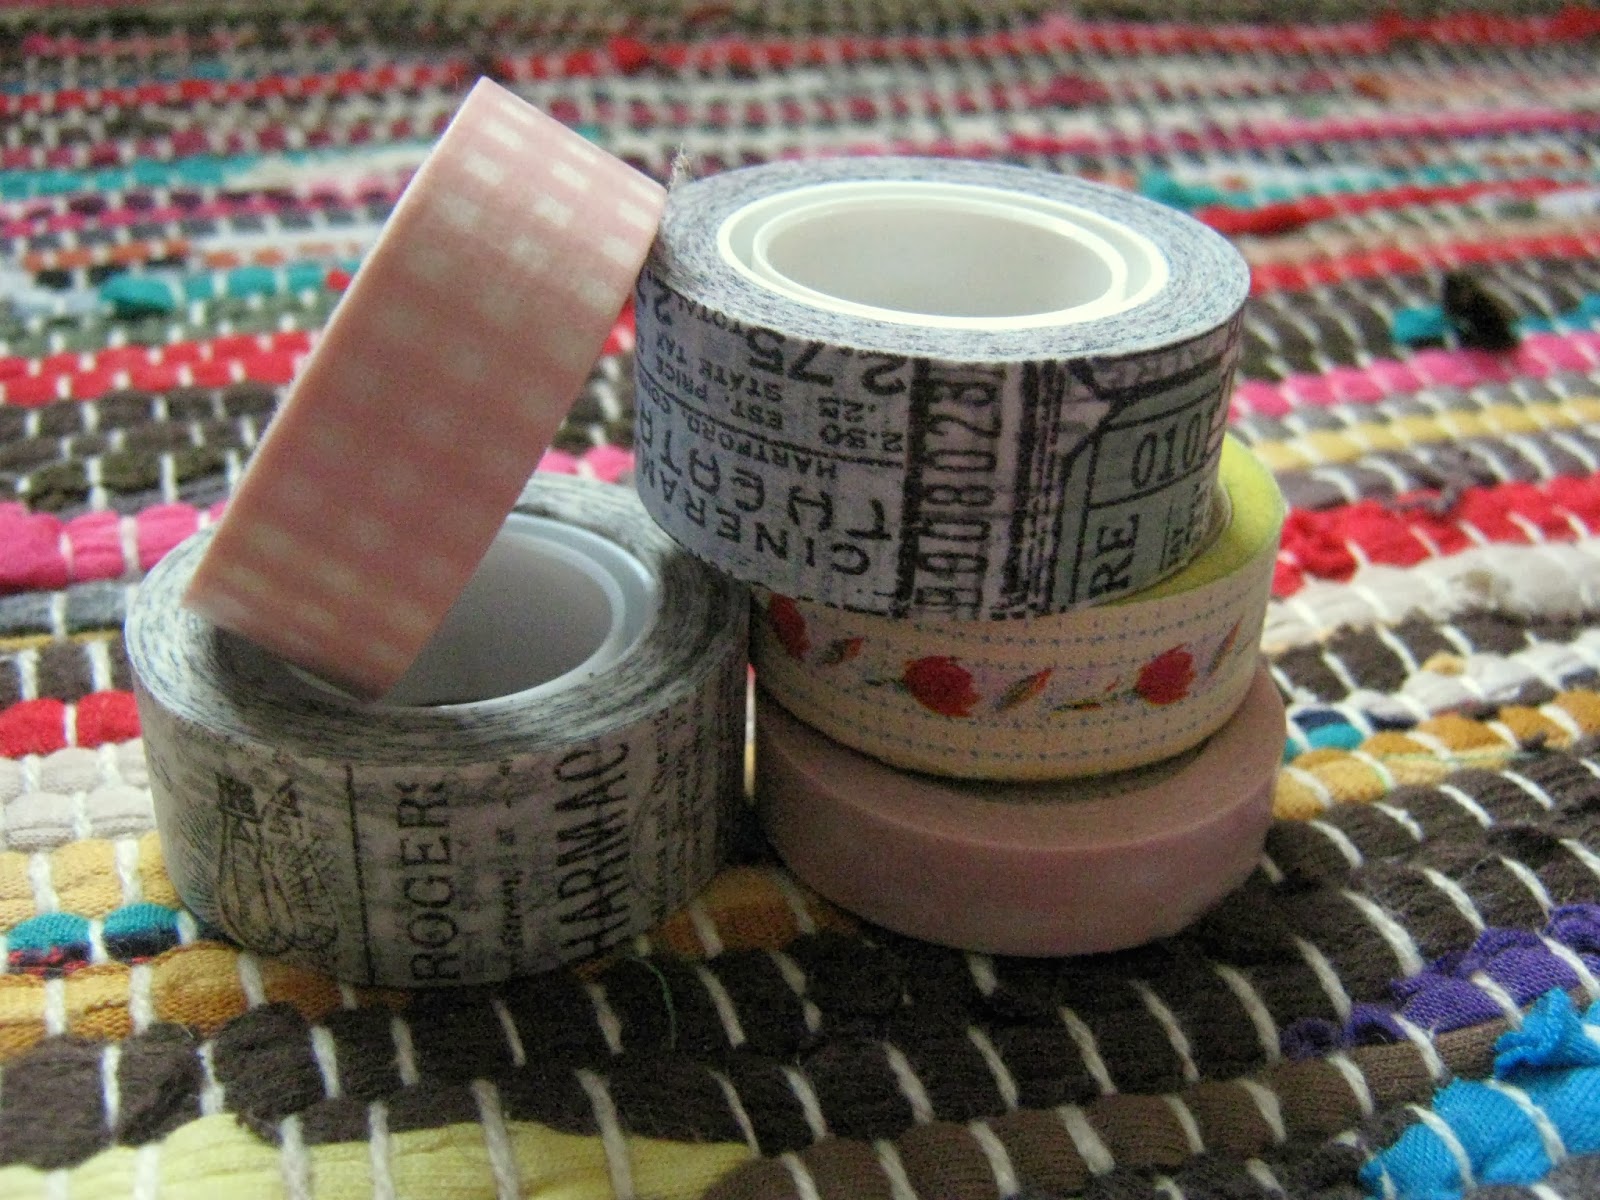
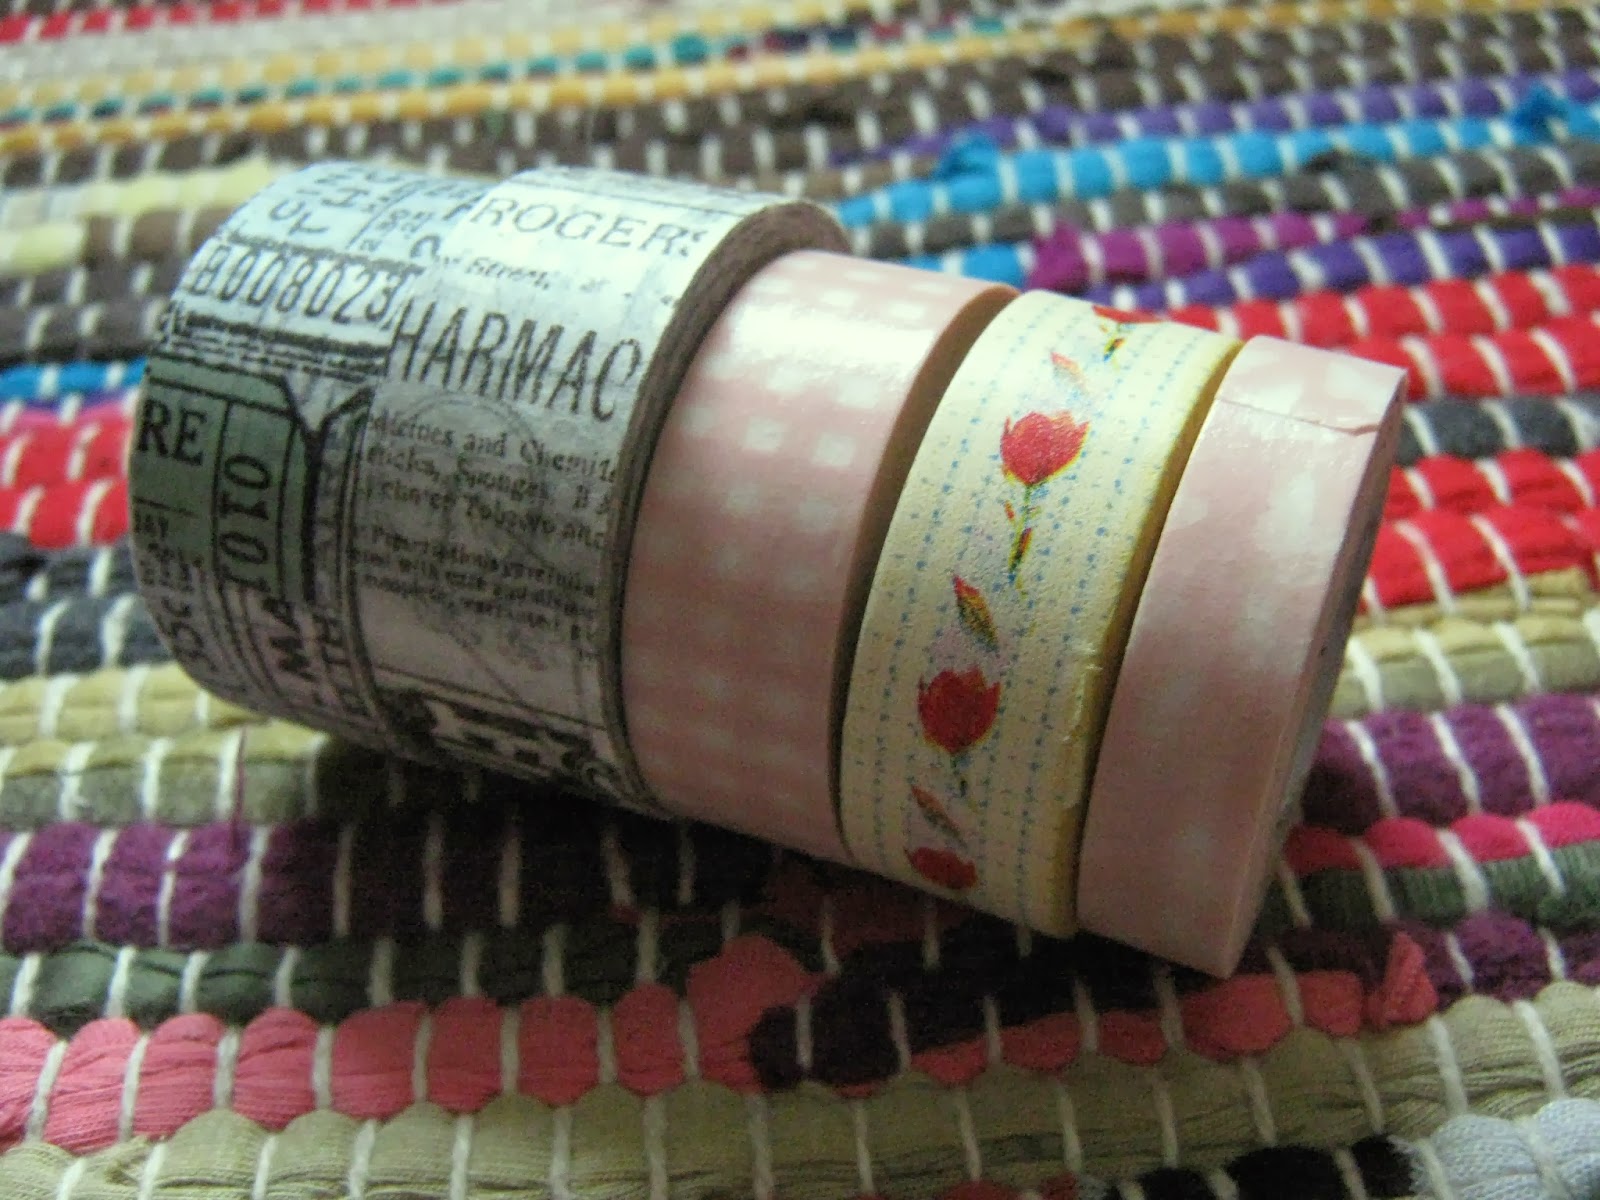
Here's my growing collection of Washi tape. At the moment I'm trying to gather a wide variety of colours, so that if I need a specific colour I have it to hand.

Washi Tape Collection

From left to right:

These two monochromatic designs have train tickets, cinema tickets and old newspaper cuttings on them, and are by Tim Holtz. They are a little more pricey than the other rolls I have bought, but there is a lot on each roll, and the tape is very high quality. The great thing about this pair is that the black and white patterns go with any colour project I am working on.

The two pink rolls came as a pair from Wilko's- is there anything you can't buy from Wilko's? Although they are quite thin and translucent, I love the pastel pink colour and the gingham and butterfly patterns. The white areas are near transparent, so you can put the tape over a coloured background to change the look of the tape quickly and easily.

This Washi tape with a red flower pattern is from eBay. There are a wide variety of Washi tapes on eBay, and if you are prepared to wait a long time for the postage, the designs from Japan are amazing. There are some equally lovely designs a little more closer to home, and this is one of them.


I originally got Washi tape to use whilst I was book-binding, to add a nice touch to notebook covers and also to tidy up any rough edges. However, I am starting to branch out and use it in different ways. It's a very easy and non permanent way to decorate - ideal if you live in rented accommodation.

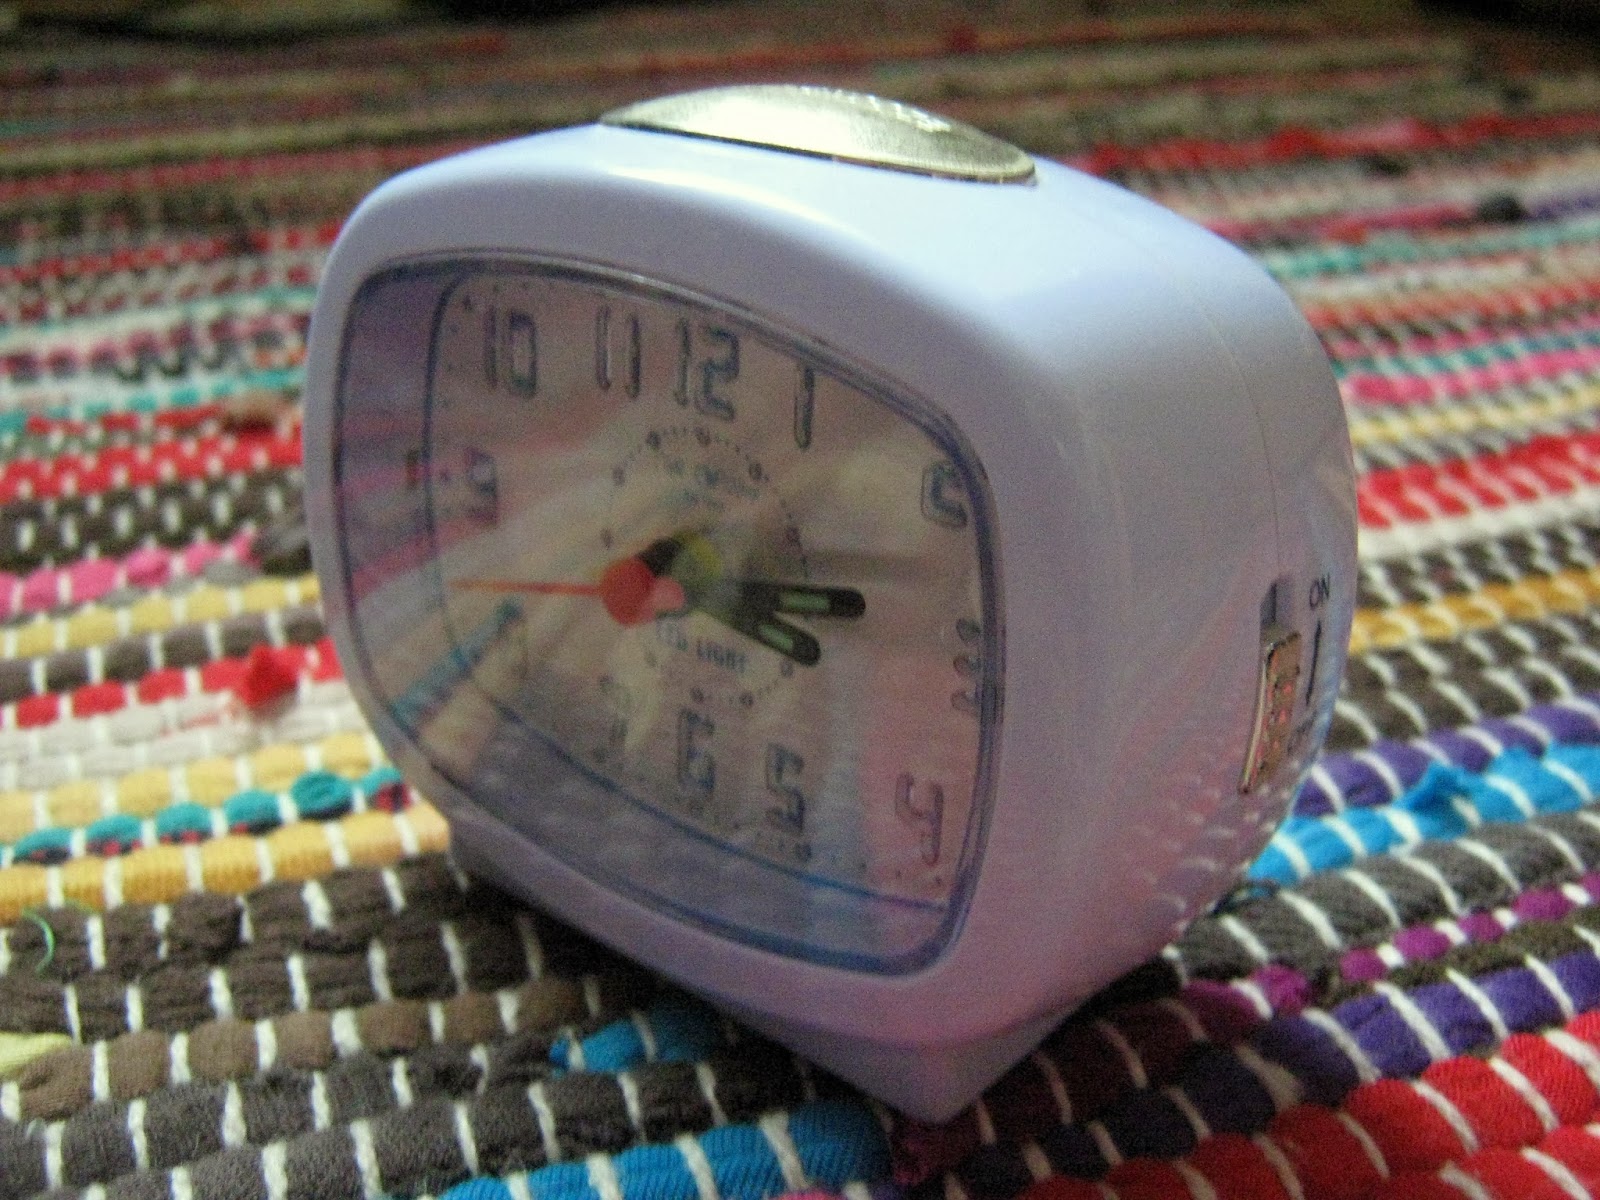
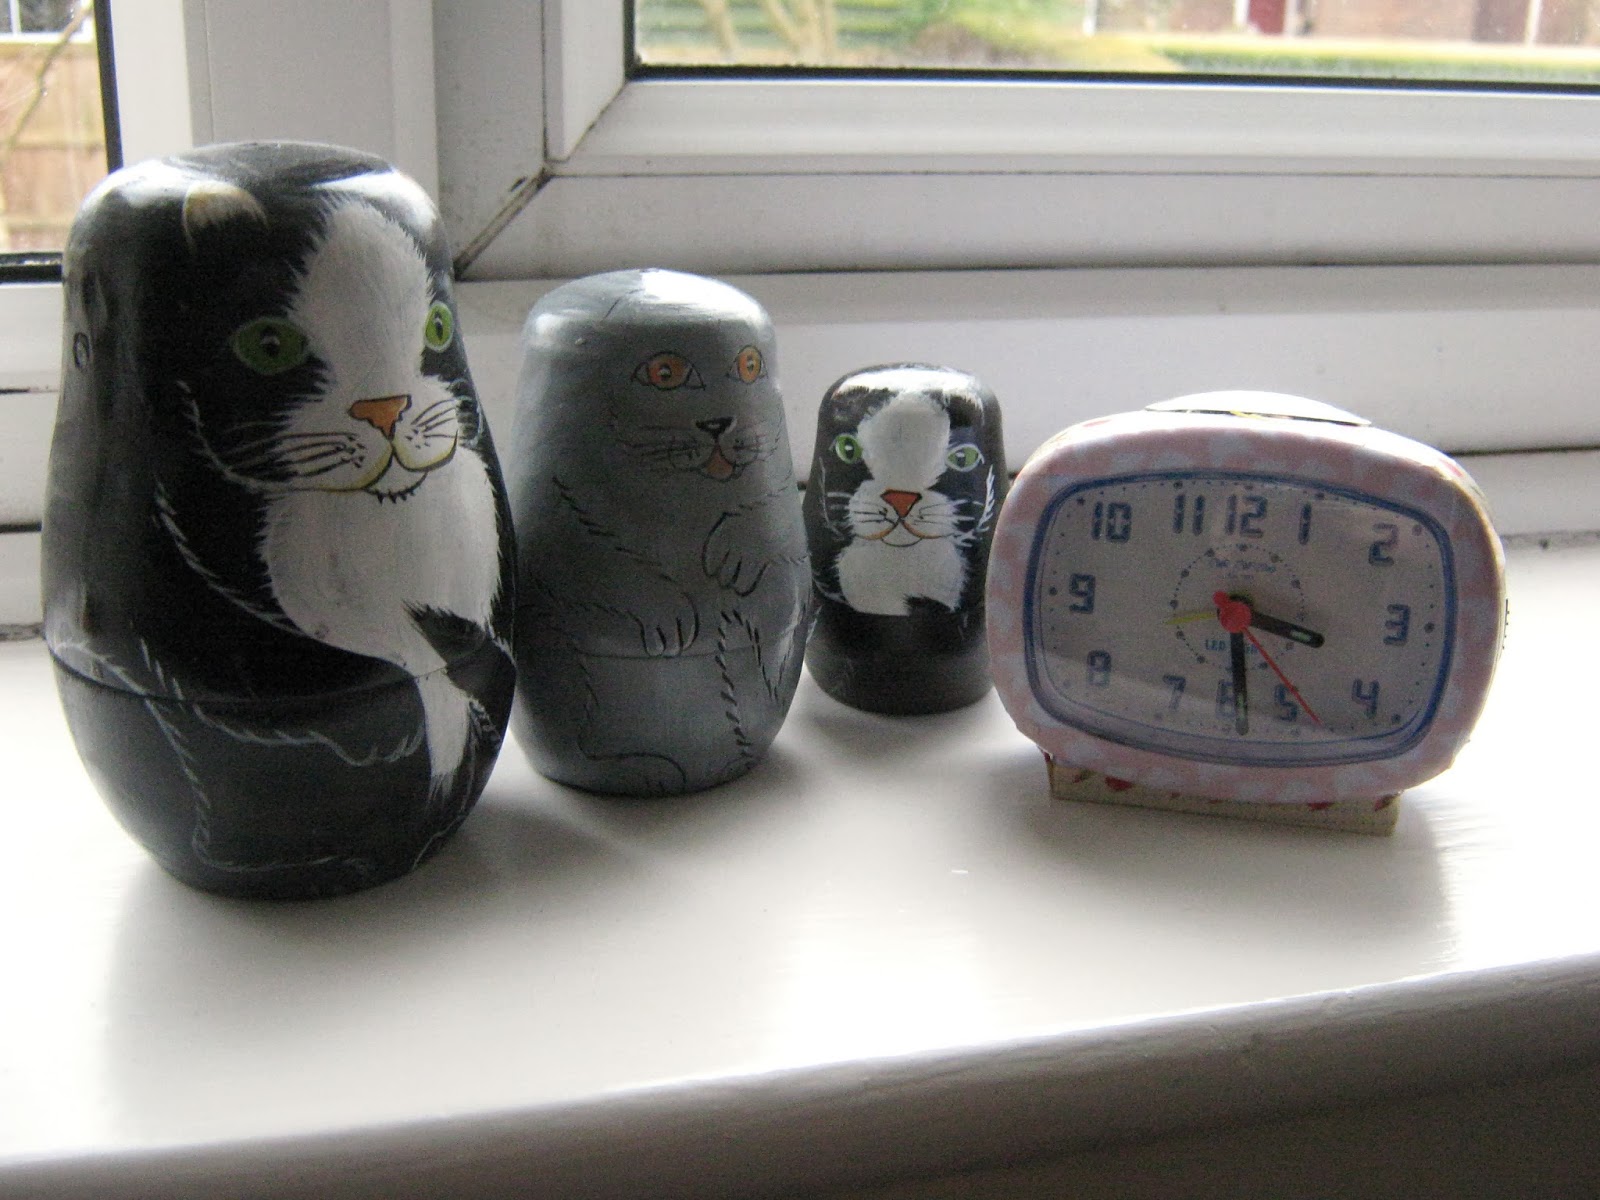
I decided to update the look of this simple alarm clock. I find it hard to come by nice looking clocks that come with an alarm, and I'm one of those people that need a big ass alarm in order to get up in a morning.

Washi Tape Alarm Clock DIY

This was very easy to do, I just cut the tape to shape and then stuck to my alarm clock. And ta-dah! It's suddenly a lot more nice to look at. Which might help me to get up on time in a morning (maybe).

Washi Tape Alarm Clock DIY

Washi Tape Alarm Clock DIY

Washi Tape Alarm Clock DIY

Washi Tape Alarm Clock DIY

You can tell how long it took me to do this by the time on my clock in the before and after pictures! Fifteen minutes at the very most, and if I ever feel like trying a different look on my alarm clock, all I have to do is peel off the tape and do it again.

Do you have a favourite brand of Washi tape you would like to recommend? Or maybe a fun way to use it? I'd love to hear your ideas!

Saturday 22 February 2014

Make a Notebook out of Playing Cards

Hi, my name's Charlotte and I have an addiction to buying packs of cards. I don't know how to play poker, find patience a little monotonous and I don't own a playing card museum, so I don't really know where this obsession stems from. But old and unusual card games are amazing, and when I see a particularly special pack, I have to have it. Maybe I buy them in the hope that I will make something really unique from them, but I think the real reason is just so I can spread them out and look at them with a big smile on my face. They just make me happy, in the same way that cats or brogues make me happy.

Vintage Card Games Playing Cards

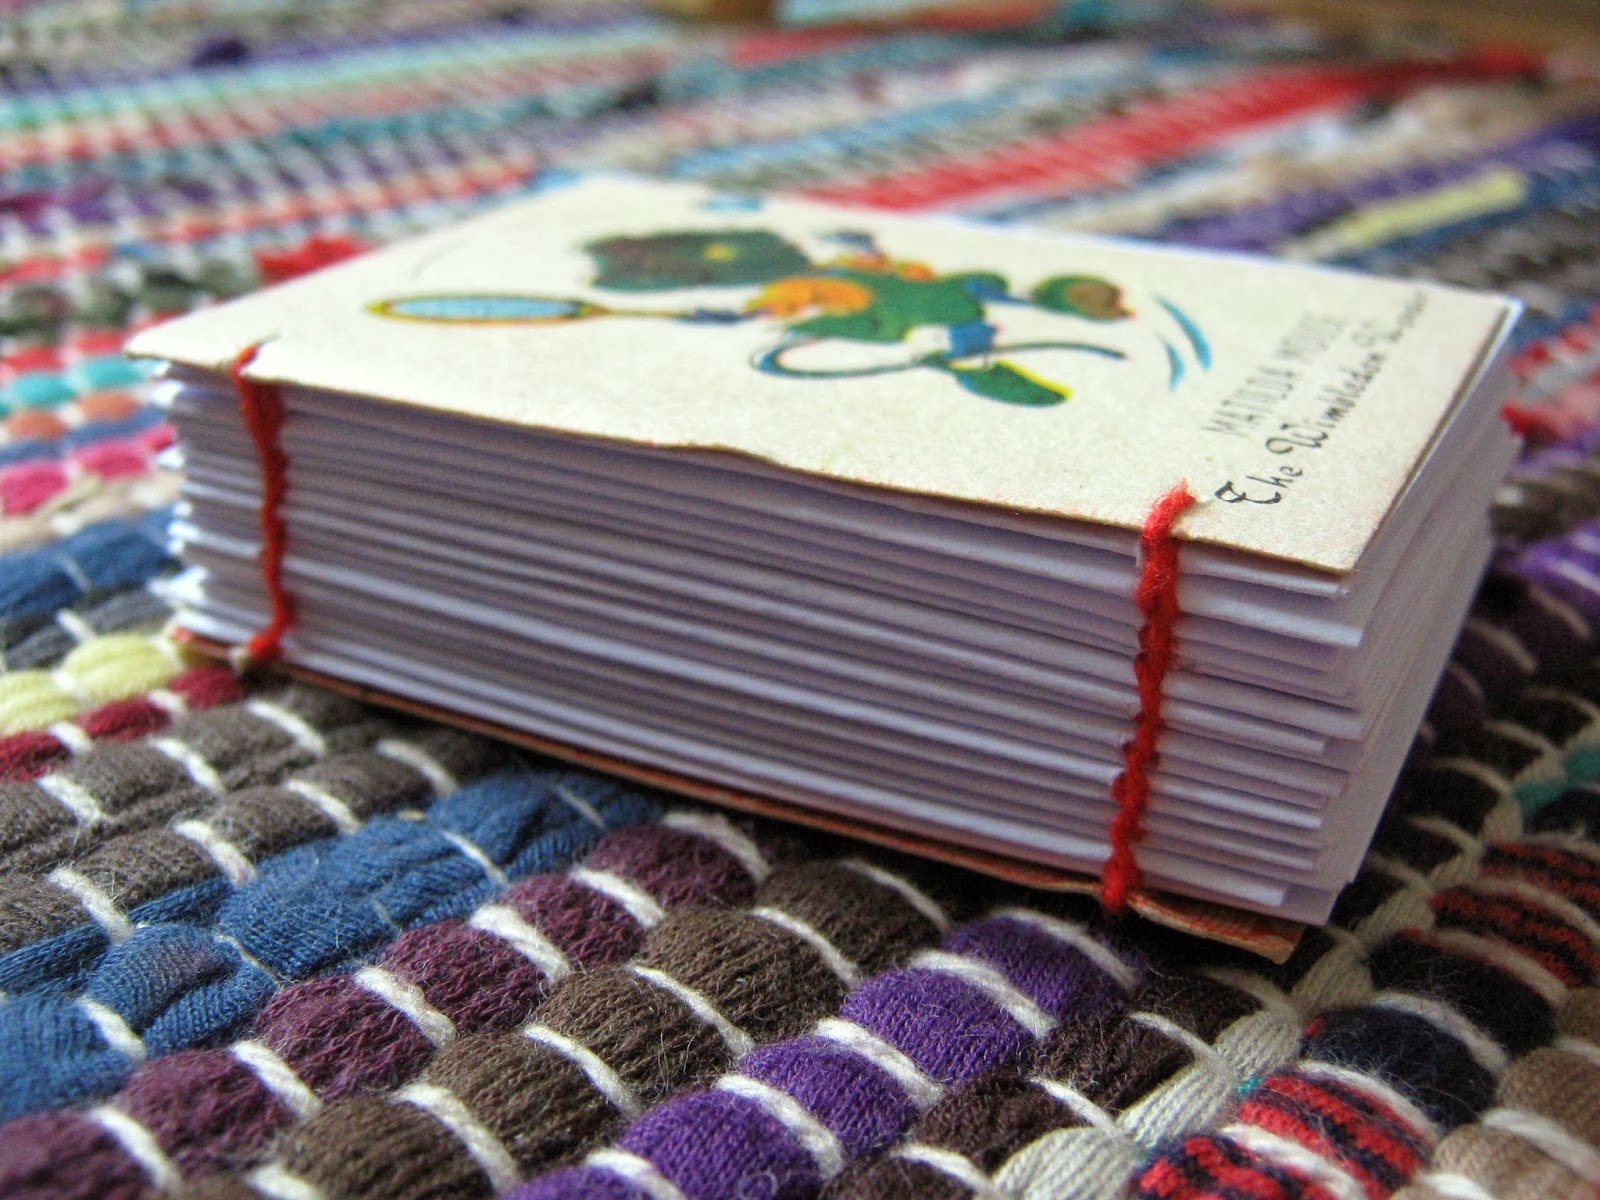
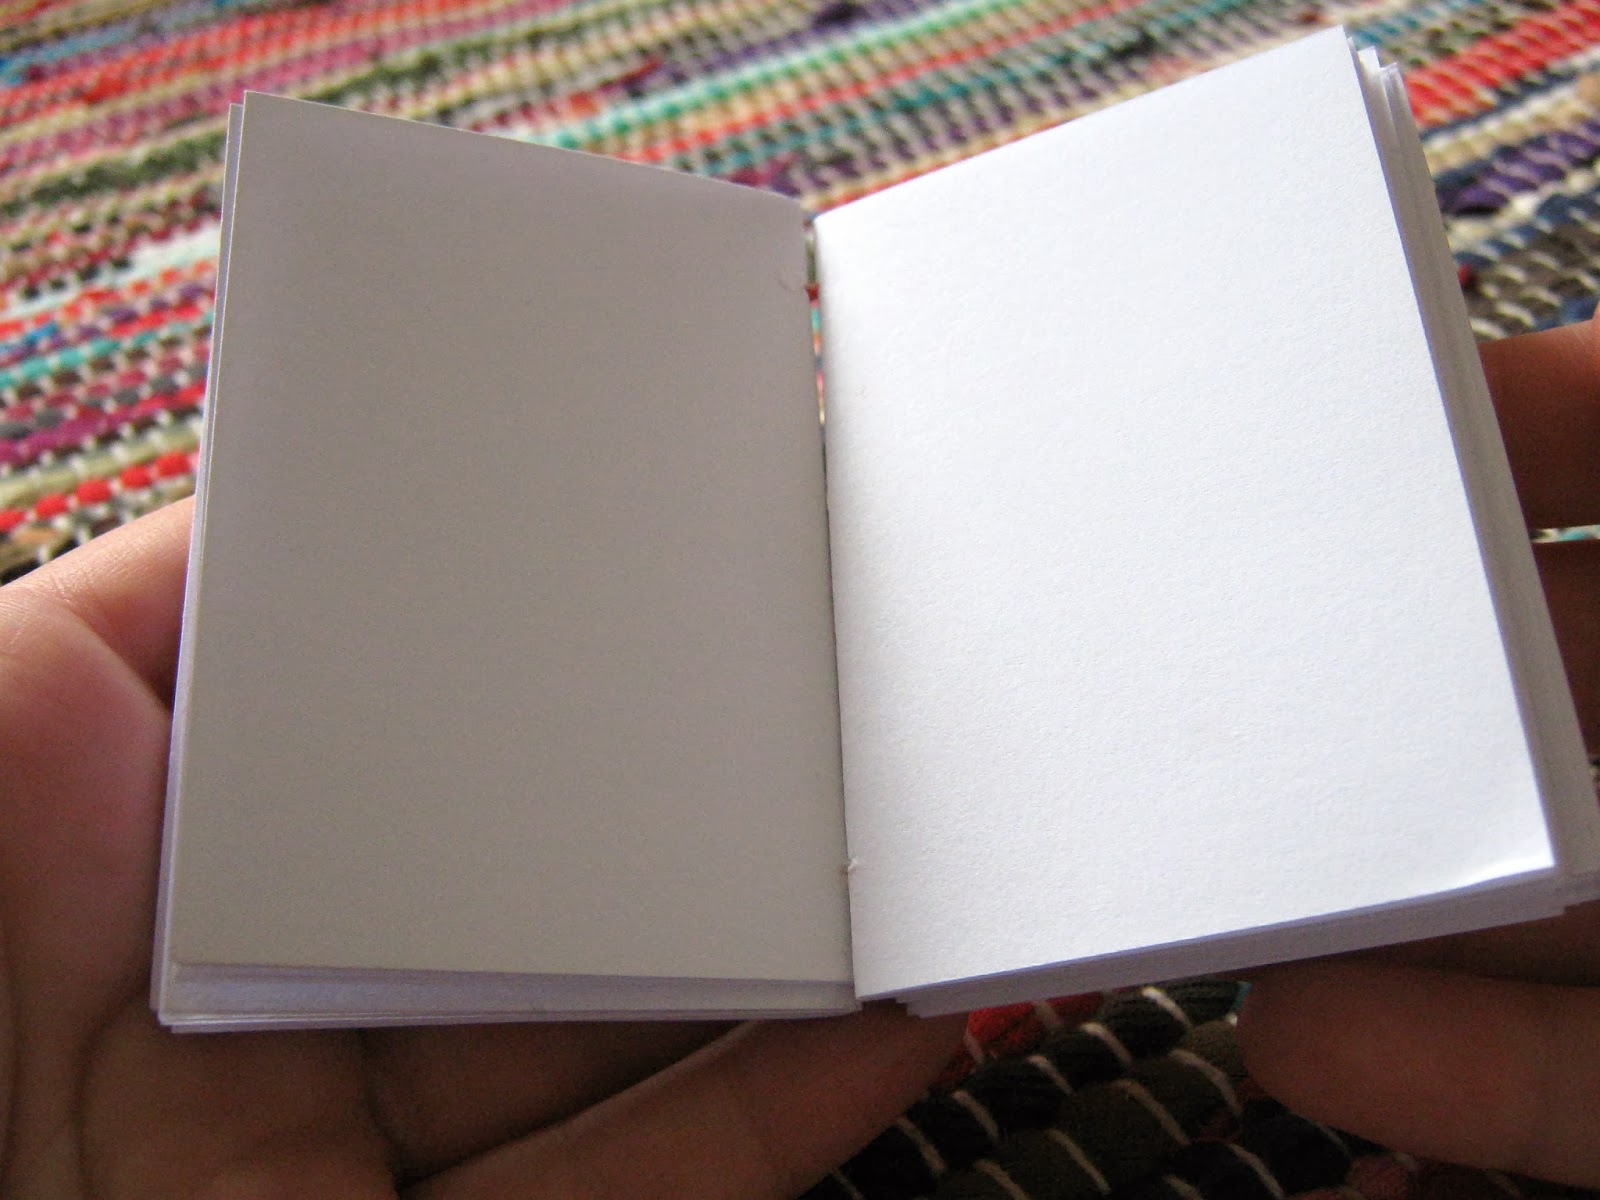
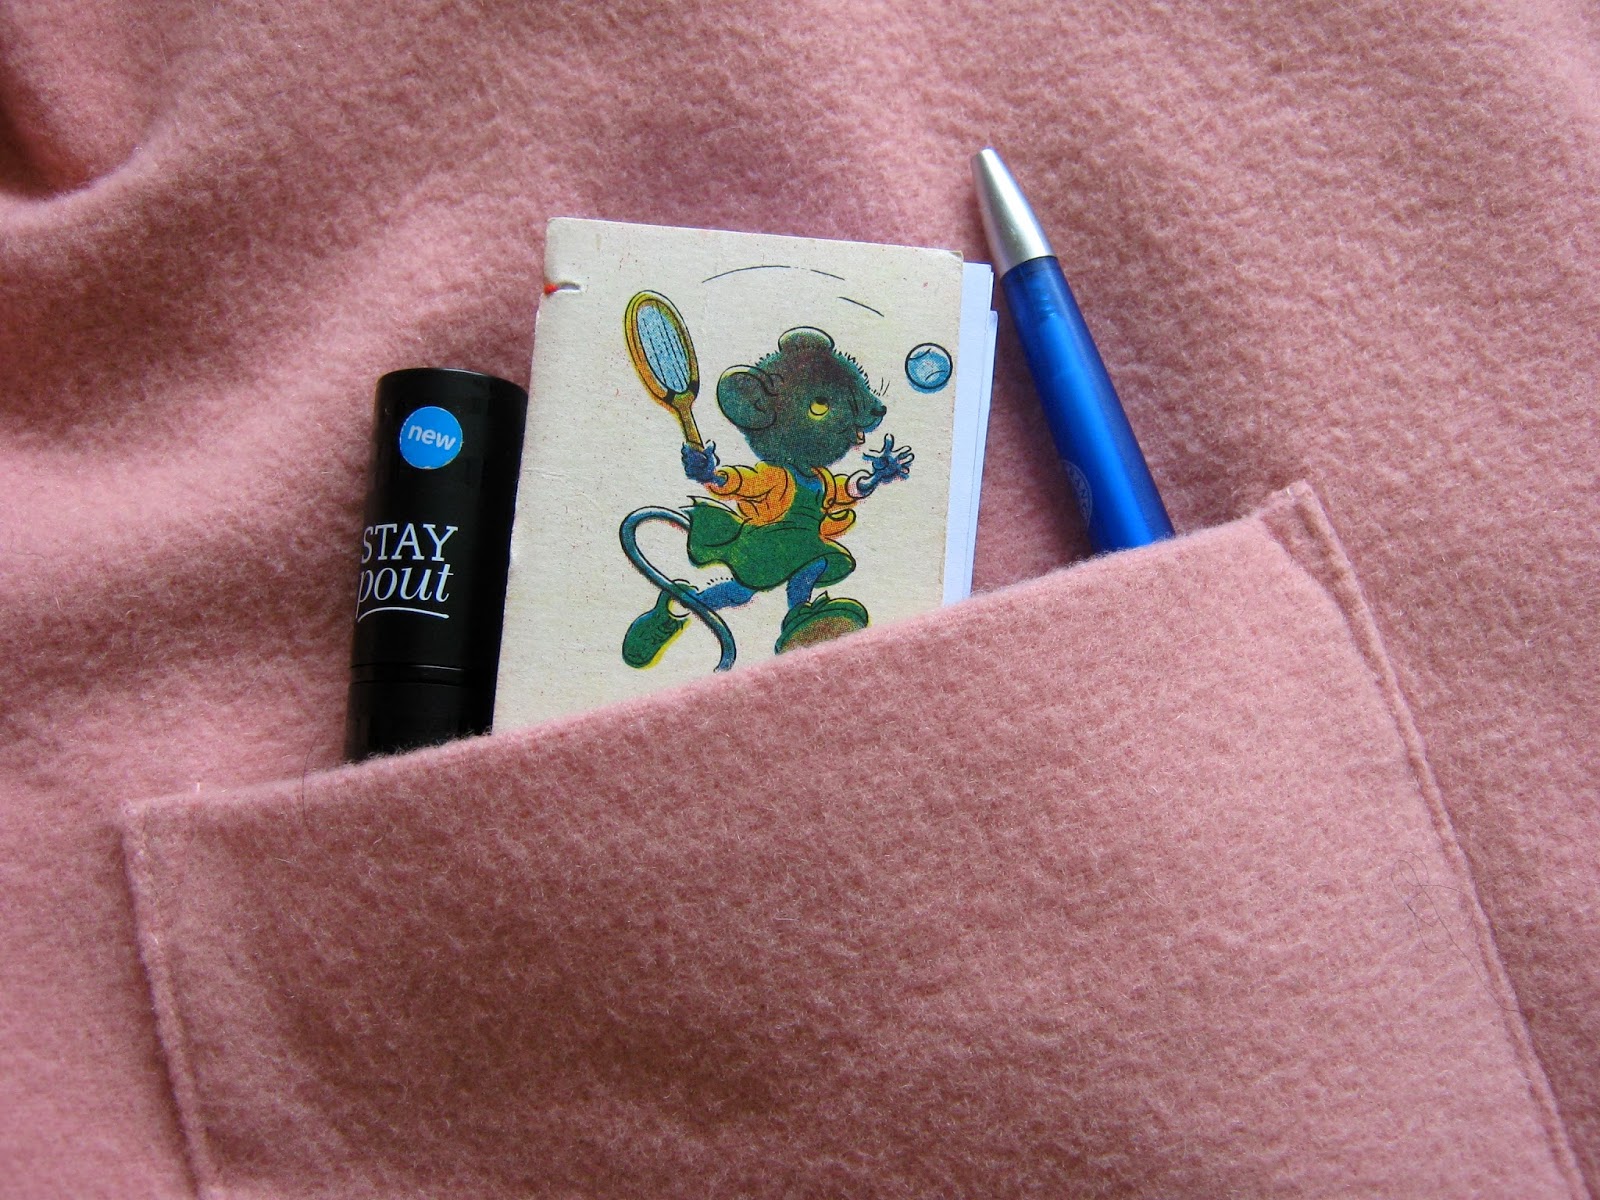
It's getting to the point where I'm thinking that I have to do something with them, as some are just too lovely to be left in their boxes. I came up with the idea of making a notebook using two cards as the front and back covers, which I can't believe I hadn't thought of sooner. I'm one of those people who still likes to write things down to remember them, and makes endless lists, so this is perfect for me. Using playing cards means that the finished notebook is the perfect size to pop in your pocket, and fits nicely in the palm of your hand.

Vintage Playing Card Notebook

Vintage Playing Card Notebook

Vintage Playing Card Notebook

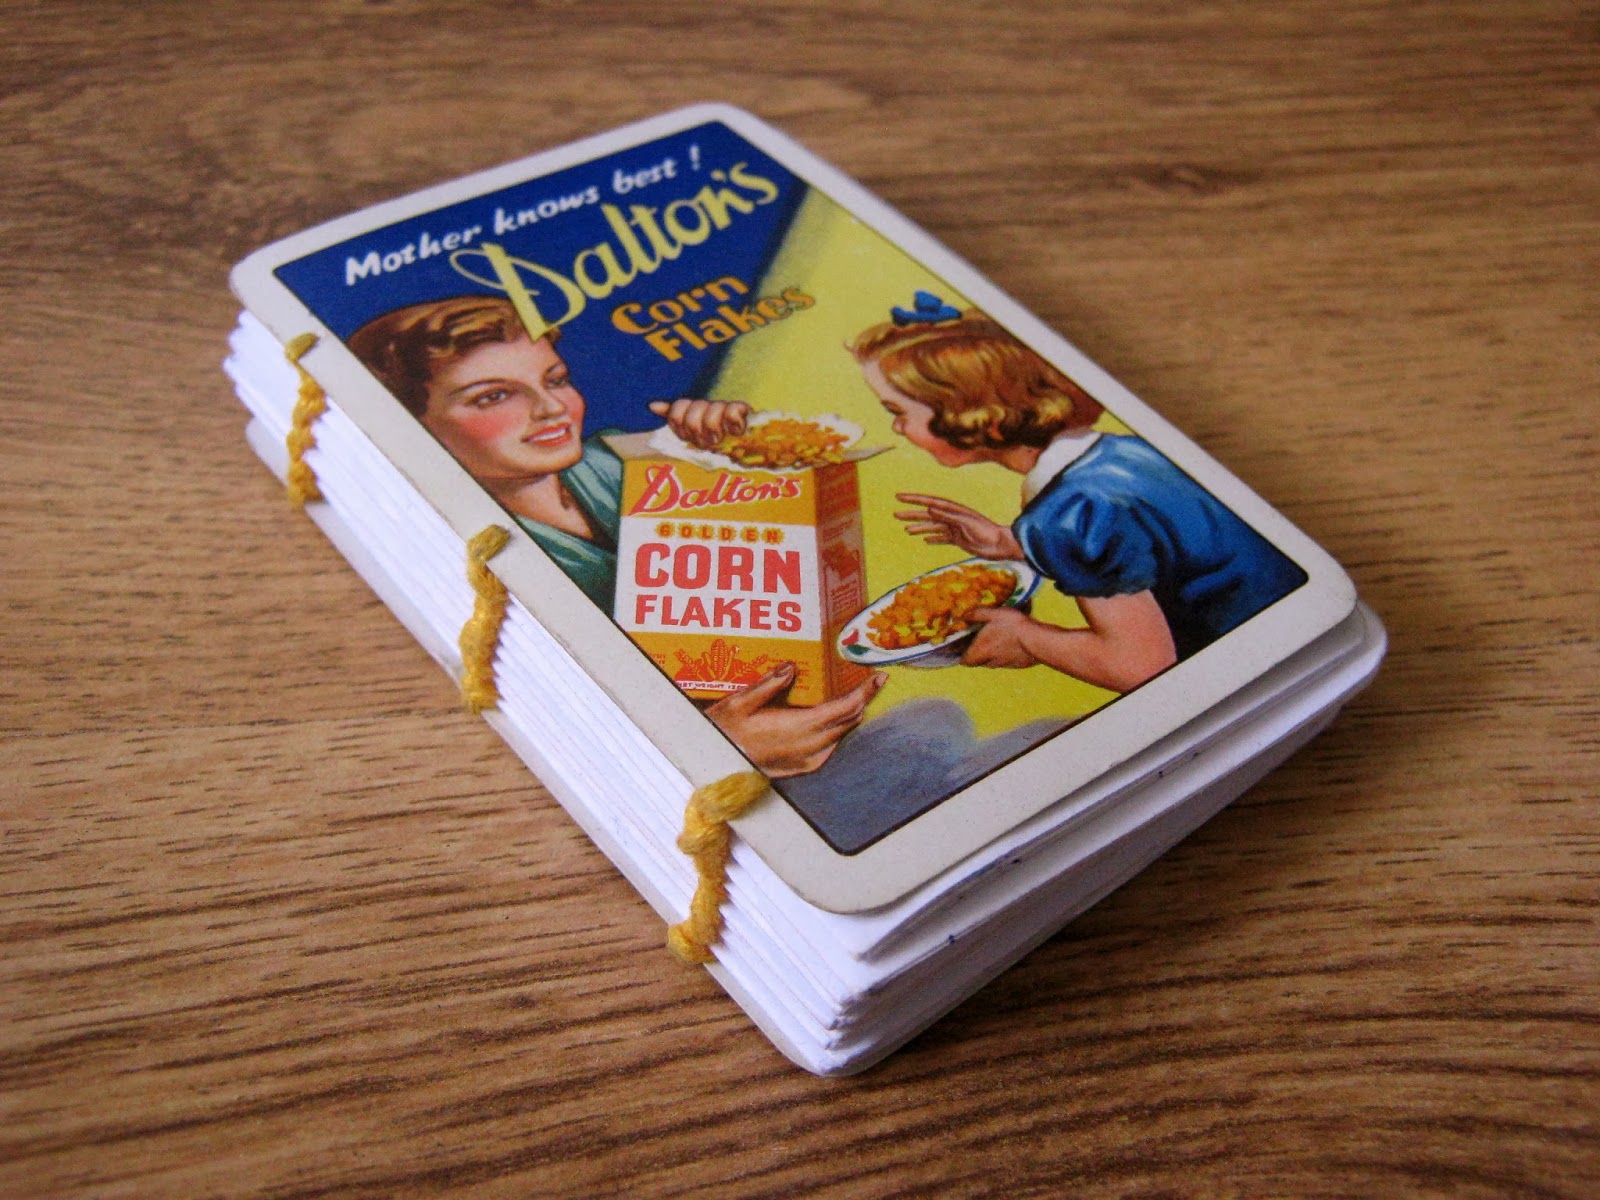
I used these vintage snap cards that I picked up ages ago for mere pennies. Next time I make a notebook using these cards, I might try to make the cards a little more sturdy, as they are quite flimsy. More modern playing cards would probably work fine. I used the same technique as I did for my Cereal Box Notebook, cutting my signatures to size and doing two rows of coptic stitch.

Vintage Playing Card Notebook

Vintage Playing Card Notebook

If you find cards with a pretty pattern on the reverse, the inside of your notebook looks good too, although if not you could always cover the reverse of your cards with a paper of your choice.

Vintage Playing Card Notebook

Great to pop into your coat pocket and know that you always have a notebook to hand.

Vintage Playing Card Notebook

Choose any playing cards you like - don't you think this "Mother Knows Best" design would be a great gift for Mother's Day? Use a thread colour that complements or contrasts the colours on your card.


Let me know if you try this or have any questions about coptic stitch - I'll try my best to help.

Thursday 20 February 2014

London Fashion Week AW 2014 - DIY the Looks

Although I believe in style over fashion, and try to avoid throw away trends, I always love looking at some of the shows from London Fashion Week, even the all out crazy ones. It's great to get a heads up on the fashion trends to come, as well as giving my craft inspiration a big boost. Even though the shows were forecasting the trends for Autumn Winter 2014, it's still so cold at the moment that most of the clothes were perfect for now. Here are my picks from my favourite shows this season (in illustration form), as well as how you could DIY the looks.

Orla Kiely

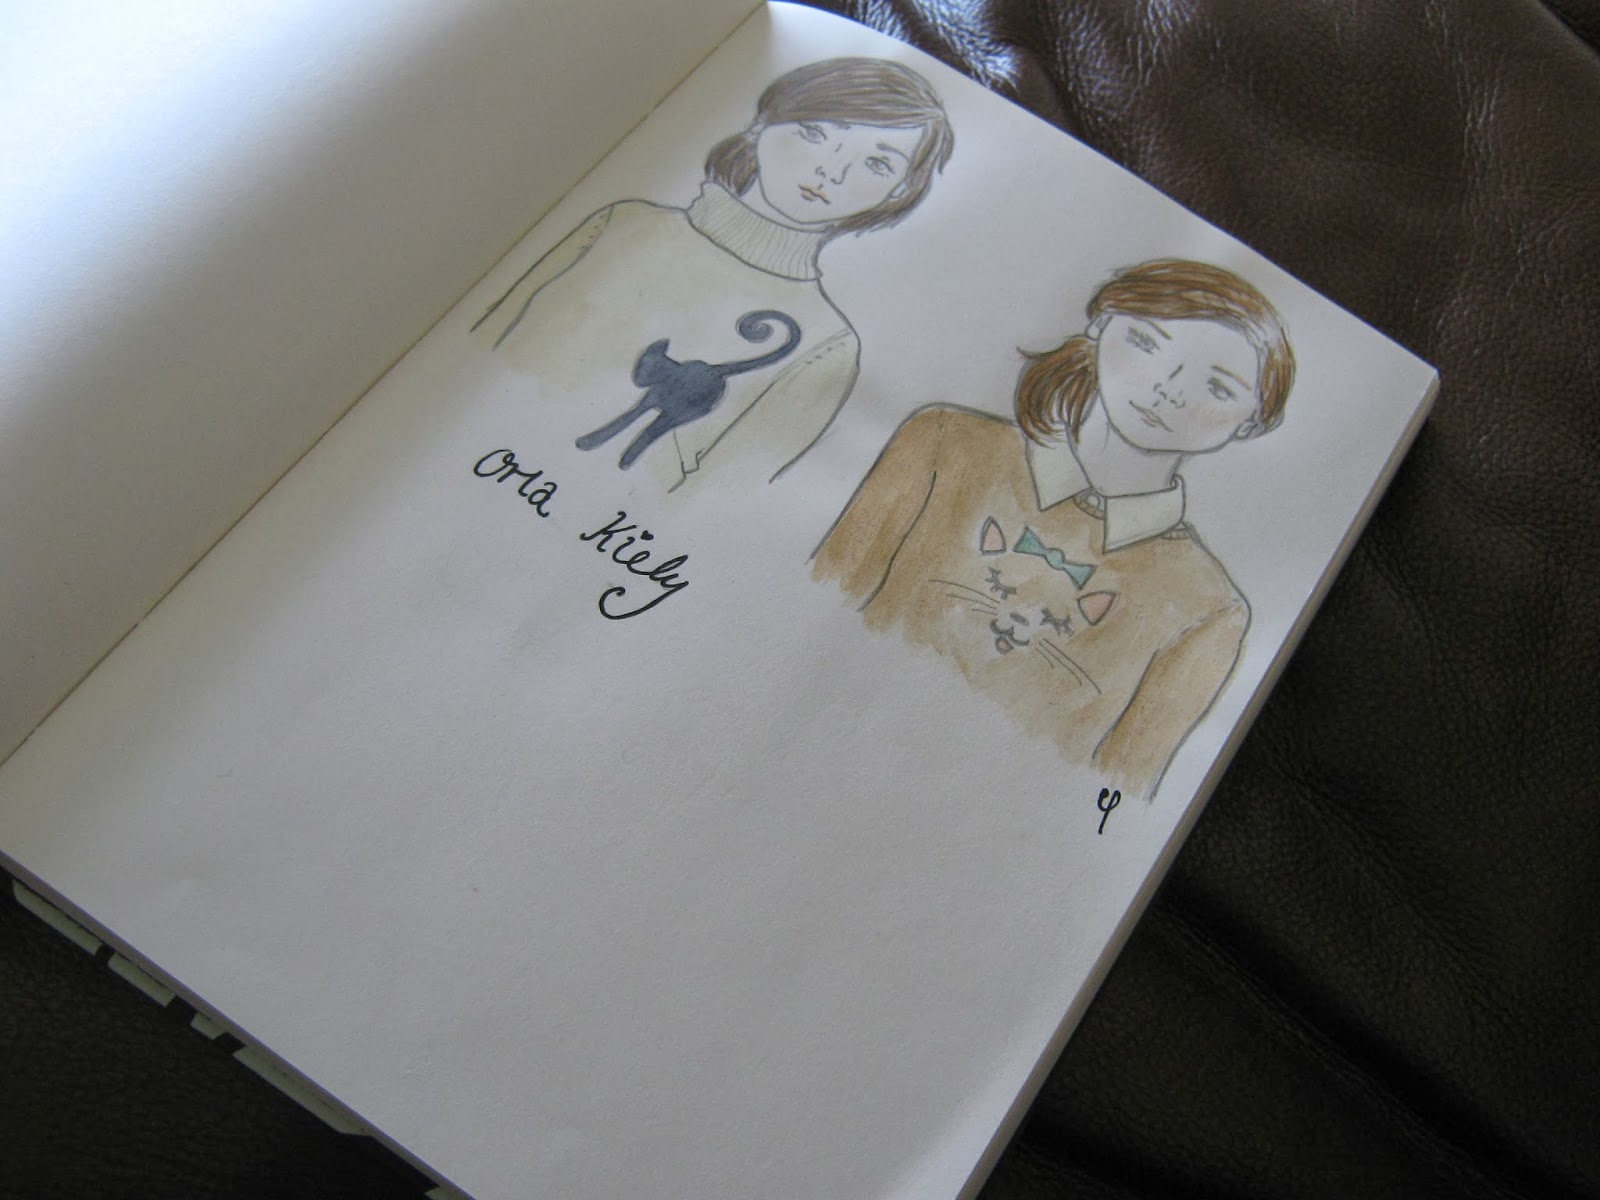
Orla Kiely Cat Jumpers Fashion Illustration

Orla Kiely is amazing at the best of times, but this time I think she outdid herself. I loved the Mary Jane chunky heels (a collaboration with Clarks - hooray!), the kooky patterns and pastel shades. There were also a lot of cat motifs, which were right up my street, as a crazy cat lady. You could embroider, applique or paint a cat silhouette or face onto a jumper or sweatshirt, to recreate the look.Just remember to wear your adorable new jumper with a peter pan collar sticking out from underneath.

Orla Kiely Cat Jumpers Fashion Illustration

Giles

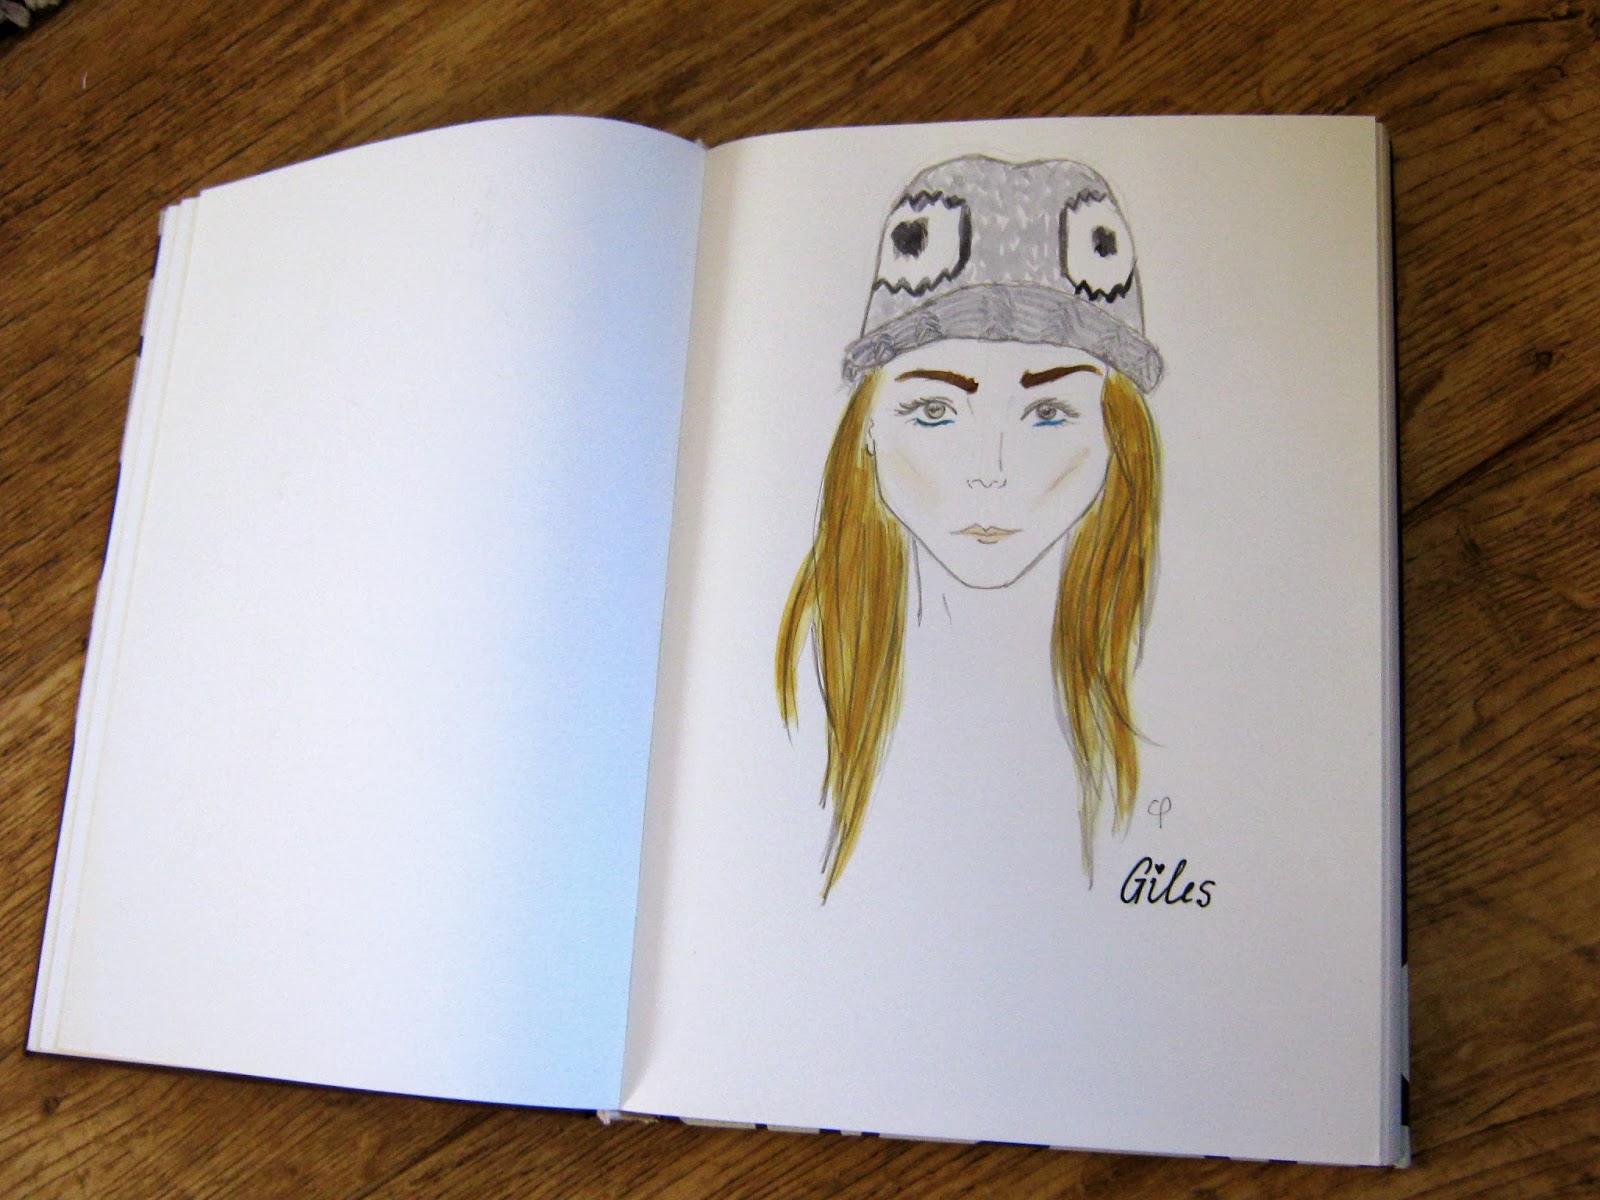
Cara Delevigne Giles Beanie Fashion Illustration

Getting eyebrows like Cara Delevigne is hard work - just ask pretty much anybody who's tried. Getting your hands on the beanie hat she wore in the Giles show is a damn side easier. In a world first, the knitting pattern was released on the same day as the show, so even if you're a really slow knitter, you should be able to get one finished in time for next winter. You can get the kit from Wool & The Gang, who got the fash pack knitting away in London. If you're feeling lazy, you can buy one already made from them too. If you don't knit, but want a piece of the DIY action, you could buy yourself a plain beanie hat and sew on some felt eyes. Check out the turquoise version - I need it!

Cara Delevigne Giles Beanie Fashion Illustration

Temperley London

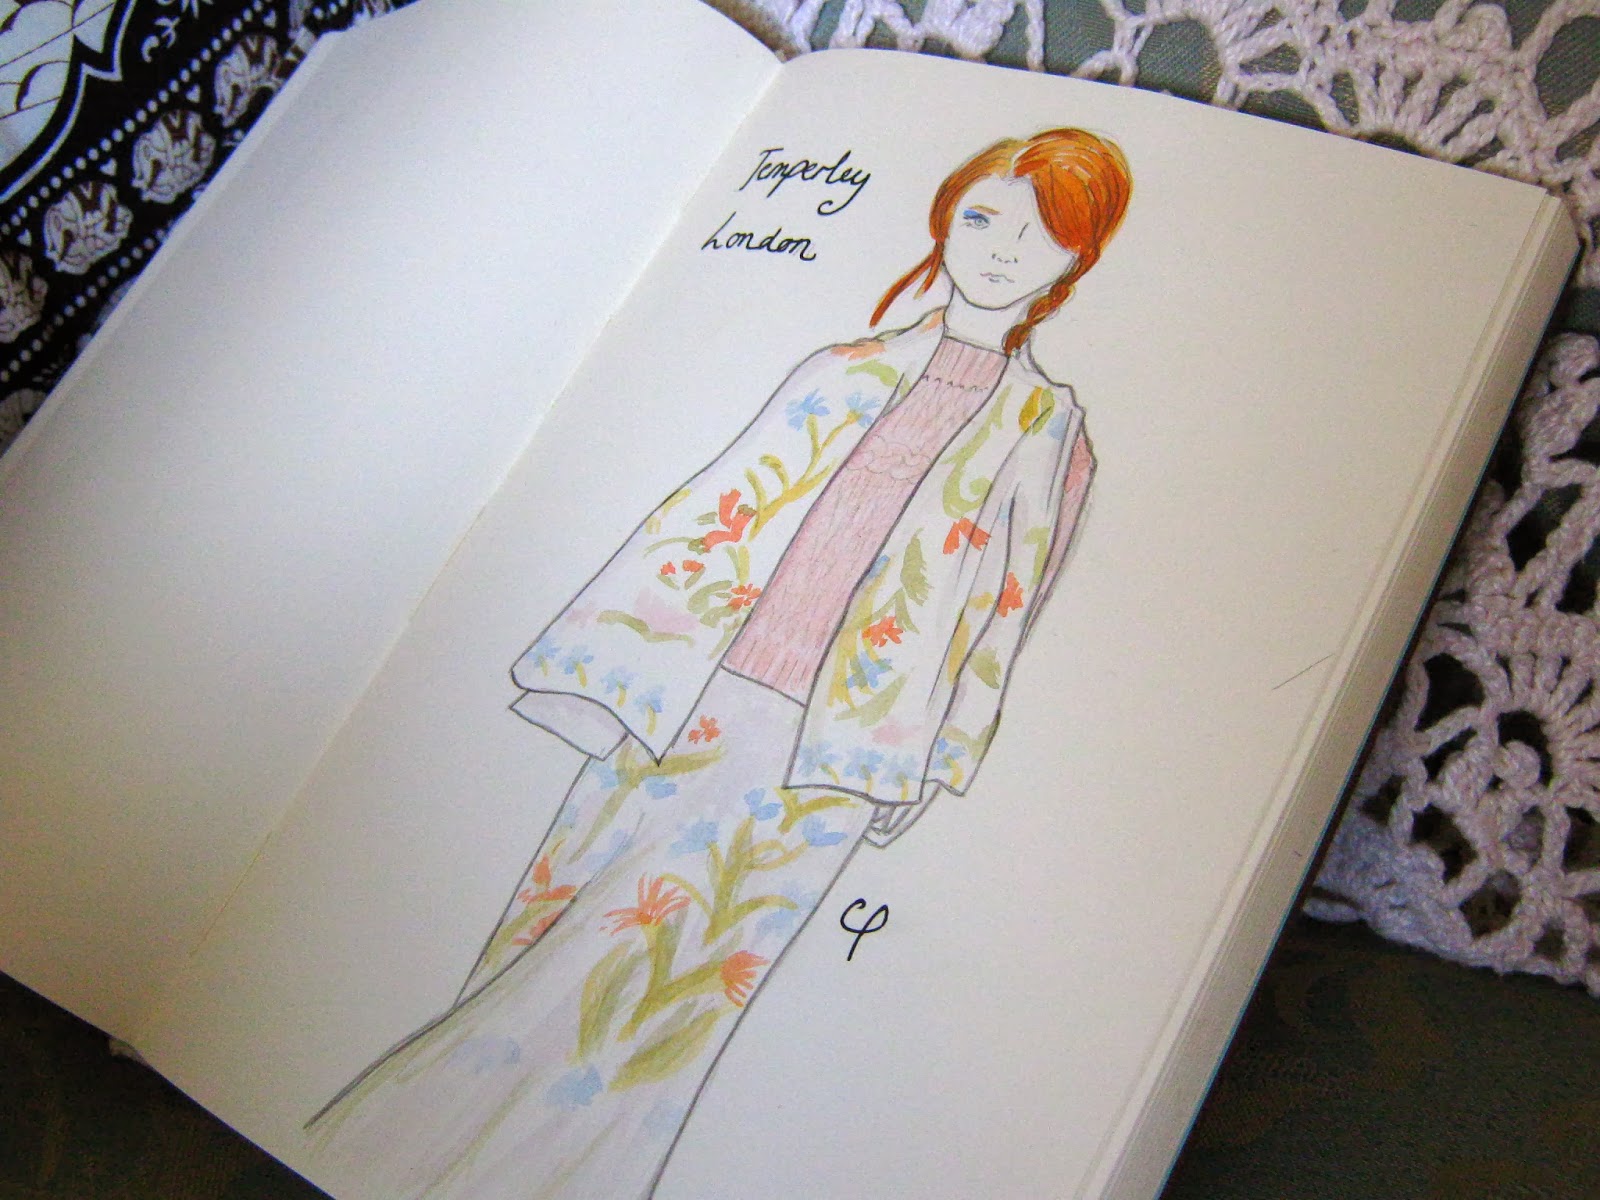
Temperley London Florals Fashion Illustration

Alice Temperley is a woman after my own heart - I loved everything in the Temperley London show this year, especially the mix of eclectic patterns with gorgeous cabled knits. To achieve a floral pattern similar to some of the ones in the show, you could embroider onto an item of clothing of your choice. The ones in the show were probably machine embroidered - it would take forever otherwise - but you could hand embroider a smaller section of your clothing. I'm thinking onto a t-shirt pocket, the collar of a shirt, the yoke of a dress or the bottom of a skirt. This would look really unique and special if you found some vintage embroidery patterns for inspiration.

Temperley London Florals Fashion Illustration


What were your favourite fashion moments from LFW? Did you see anything that you thought would be easy to customise or make yourself?

Monday 17 February 2014

What to do with problem yarn...

For every genuine, brilliant thrifty buy I find, I am equally likely to fall victim to a bad bargainous buy. You know, the kind of thing that seemed like a perfect, cheap buy at the time, but actually turned out to be a complete waste of money? Yep, it happens to all of us, you get blinded by what seems like good value for money, without remembering that sometimes there is a reason why things are cheap, or have ended up in second hand shops. This was one of those buys...


I came across oodles of these balls of yarn in a second hand shop (seriously, tons of the stuff). I can't remember how much it cost me for the whole lot (although it was probably very, very cheap). Why? Because I have had this wool for YEARS. And I've never used it once. It's not to do with the colour, which is a lovely cobalt come navy blue, and I don't think anyone incapable of liking such a colour. It's more to do with the strange texture - one minute it's an extra thin cotton, probably best suited to lace making, then WHAM - it's super chunky, but only for all of a couple of stitches. A very specific type of yarn, I think you'll agree. It's a vintage wool, which is called "Bubbles", and would probably be fine if you had a pattern to use with it, or even some vague idea of what you wanted to do with it. However, I don't have either of these, and so this yarn is sat sadly within my wool stash. 

I have tried and failed for many years now to find a use for this wool. Maybe it would be suitable for a scarf? But then again, I don't think I want a scarf with such a strange and uneven texture. And also, if I was to knit with such an unpleasing yarn to knit with, I think I'd want something more than a scarf for my efforts, no? 


So, I guess the moral of the story is to never buy a load of wool if you can't immediately think of exactly how to use it. Especially if it is a very specific type of wool, either in texture or colour. Have I learnt from this lesson? Maybe, but I wouldn't be surprised if it happened to me again. When I see copious amounts of cheap wool, there's no stopping me. Once a bargain hunter, always a bargain hunter. 

Have you ever bought a lot of wool, only to find you have no use for it? Do you have any ideas on what I could use this wool for, or is it finally time to say goodbye to Bubbles for good?

Saturday 15 February 2014

Recipe: Peanut Butter and Chocolate Cupcakes

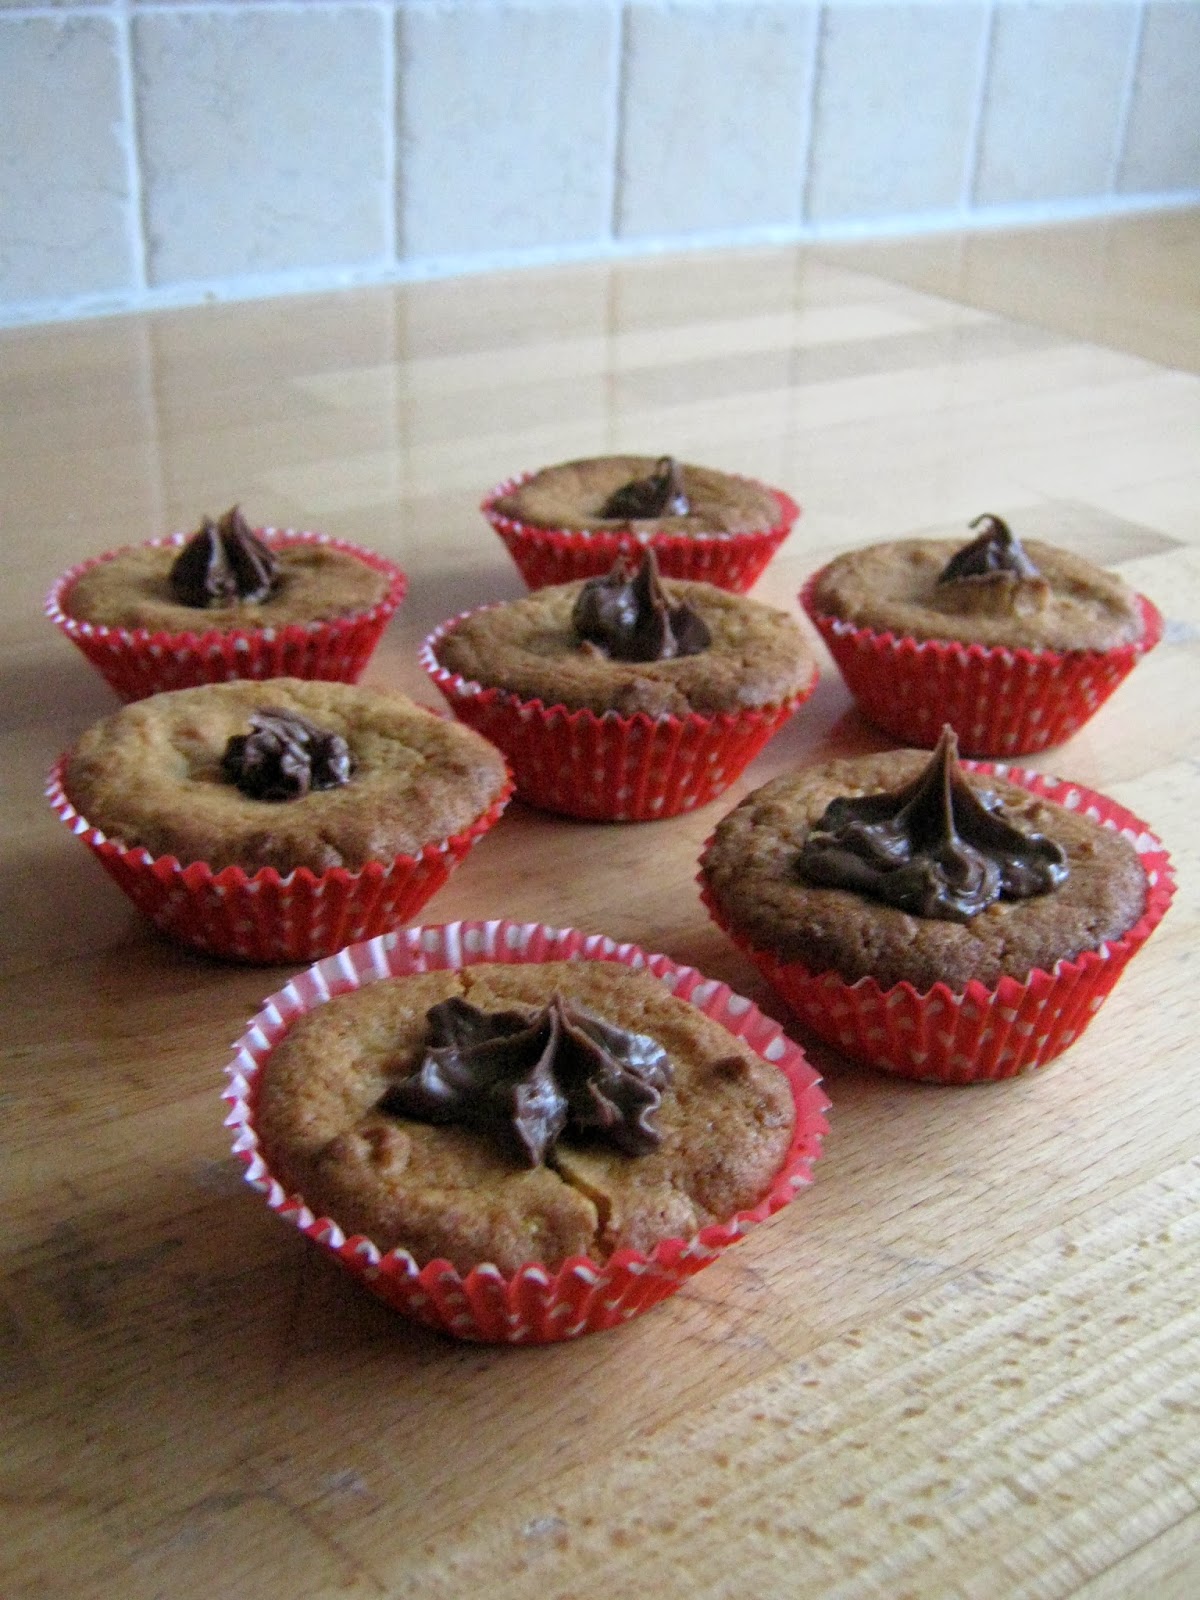
Peanut Butter and Chocolate Cupcakes

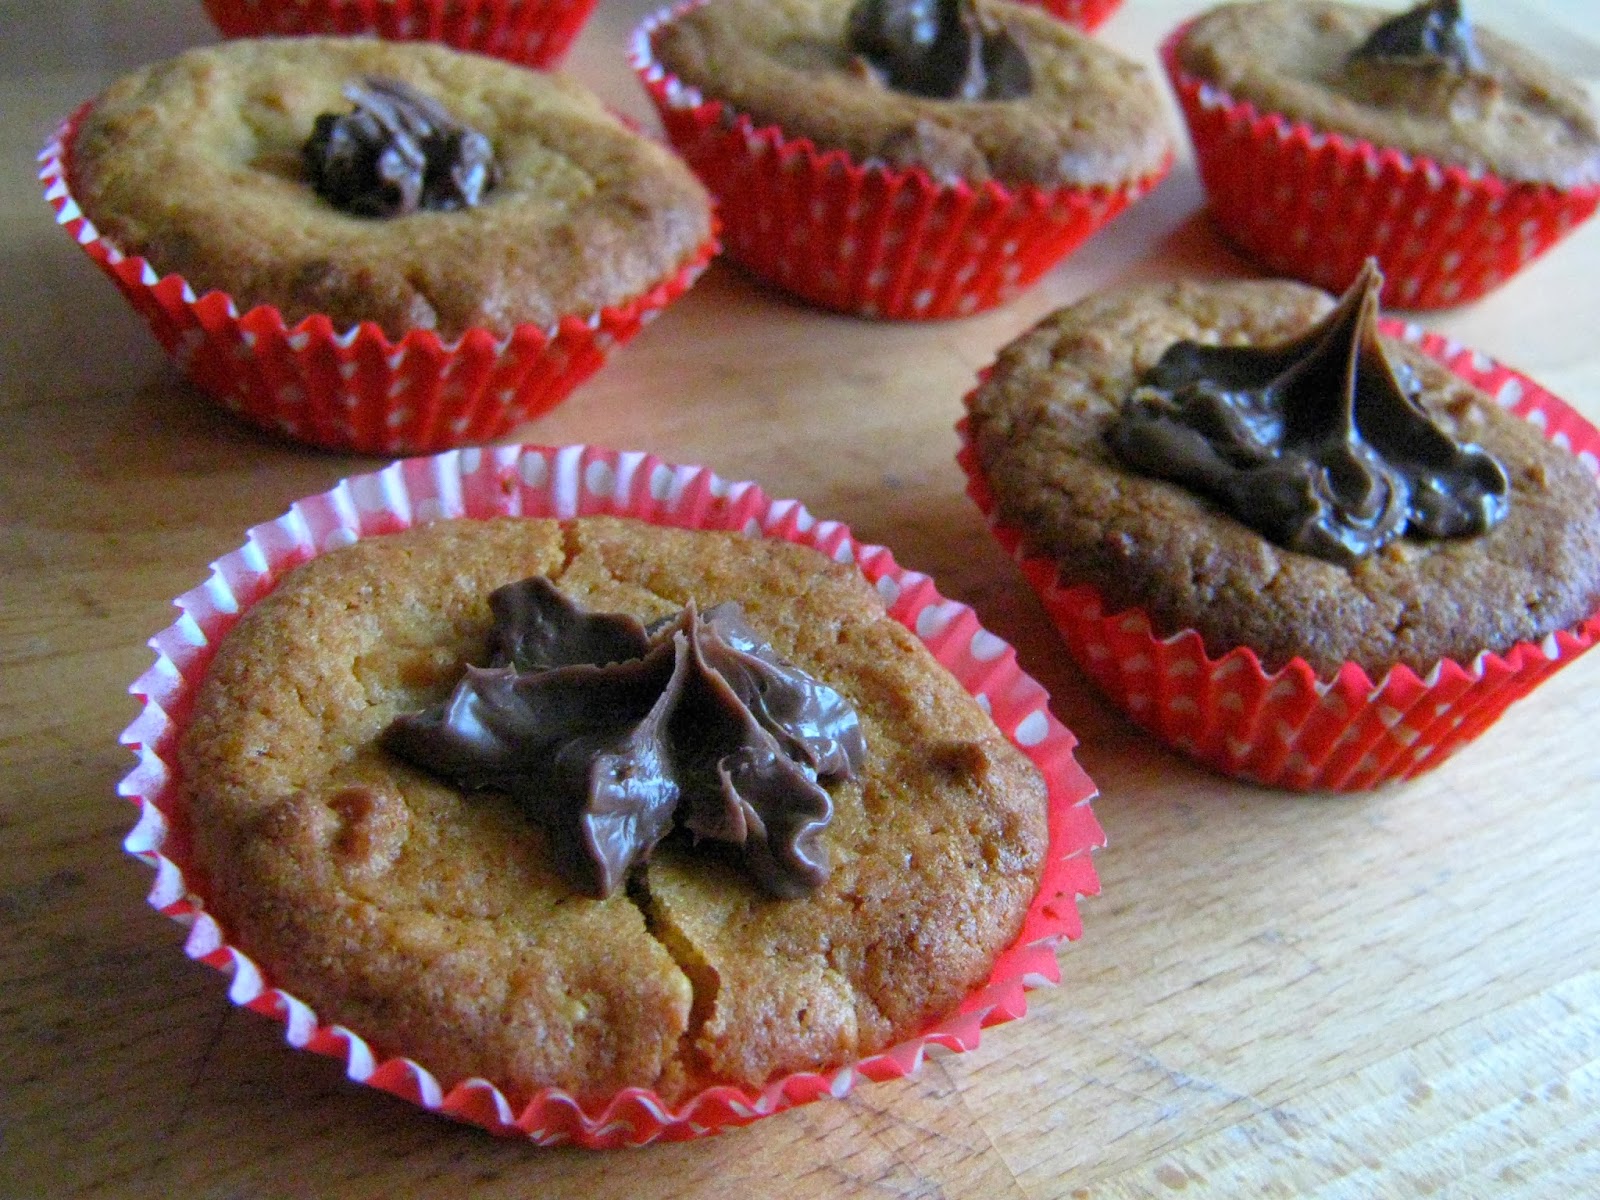
Peanut Butter and Chocolate Cupcakes

Today I felt like pigging out, big time, so I whipped up these bad boys. This is basically a result of me seeing whatever ingredients I had in, and then throwing them all together, but it actually turned out very well. These peanut butter cupcakes have a Nutella filling, and they are very rich and decadent, a perfect naughty treat. You could make them without the filling if you don't fancy something quite so sickly, but I'd recommend going all out (I have a big sweet tooth).

Ingredients: (Makes 16 Cupcakes)

150g Granulated Sugar
150g Butter/Margarine
150g Self Raising Flour
2 Whole Eggs
125g Crunchy Peanut Butter
Milk

For the Filling:

Nutella (other chocolate-hazelnut spreads are available)

Recipe:

1. Preheat your oven to 180 degrees Celsius

2. Cream the butter and sugar together in a large bowl until light and fluffy.

3. Mix in the peanut butter to the butter/sugar mix, until it is thoroughly mixed in.

4. Crack in two eggs, and beat them into the mix.

5. Fold the self raising flour into the mixture, and mix until there are no lumps. If your cake mix seems a little dry at this point (mine was), stir in a little milk, I added about a tablespoon to mine.

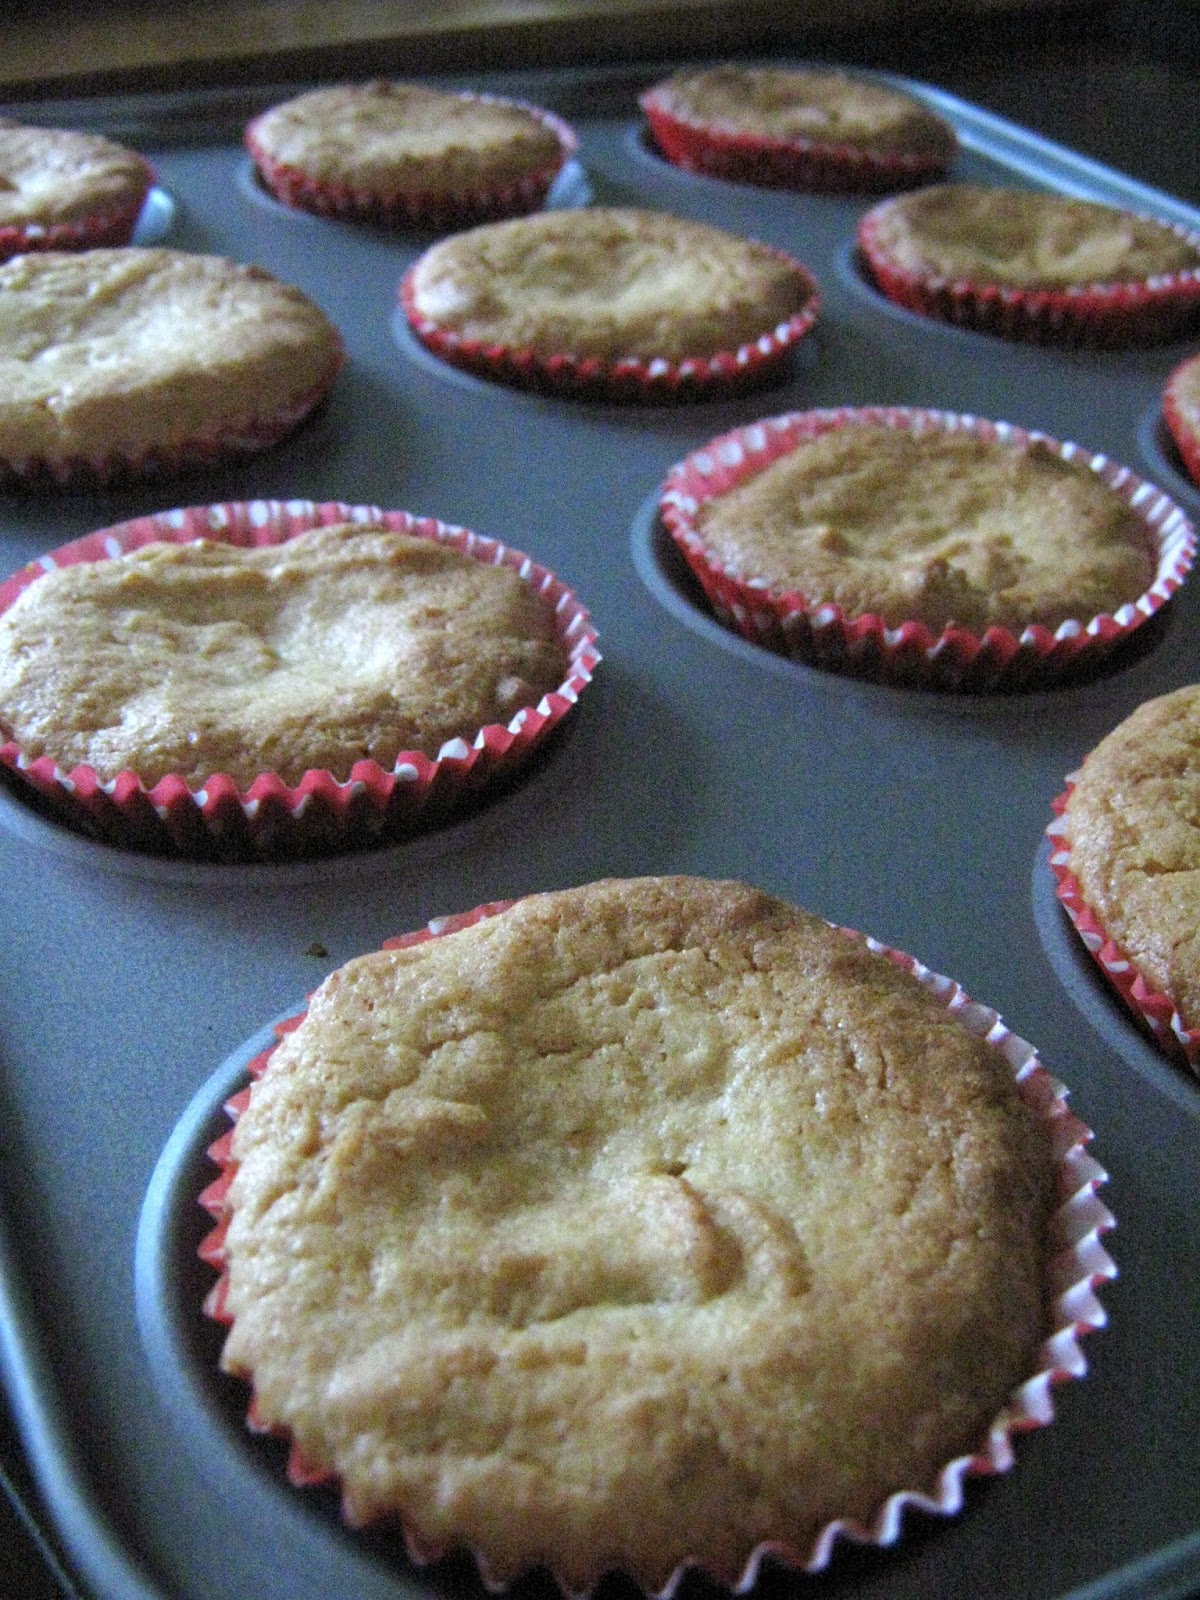
6. Spoon your mixture into cupcake cases, and bake in the oven for about 15-20 minutes, until they are golden brown.

Peanut Butter and Chocolate Cupcakes

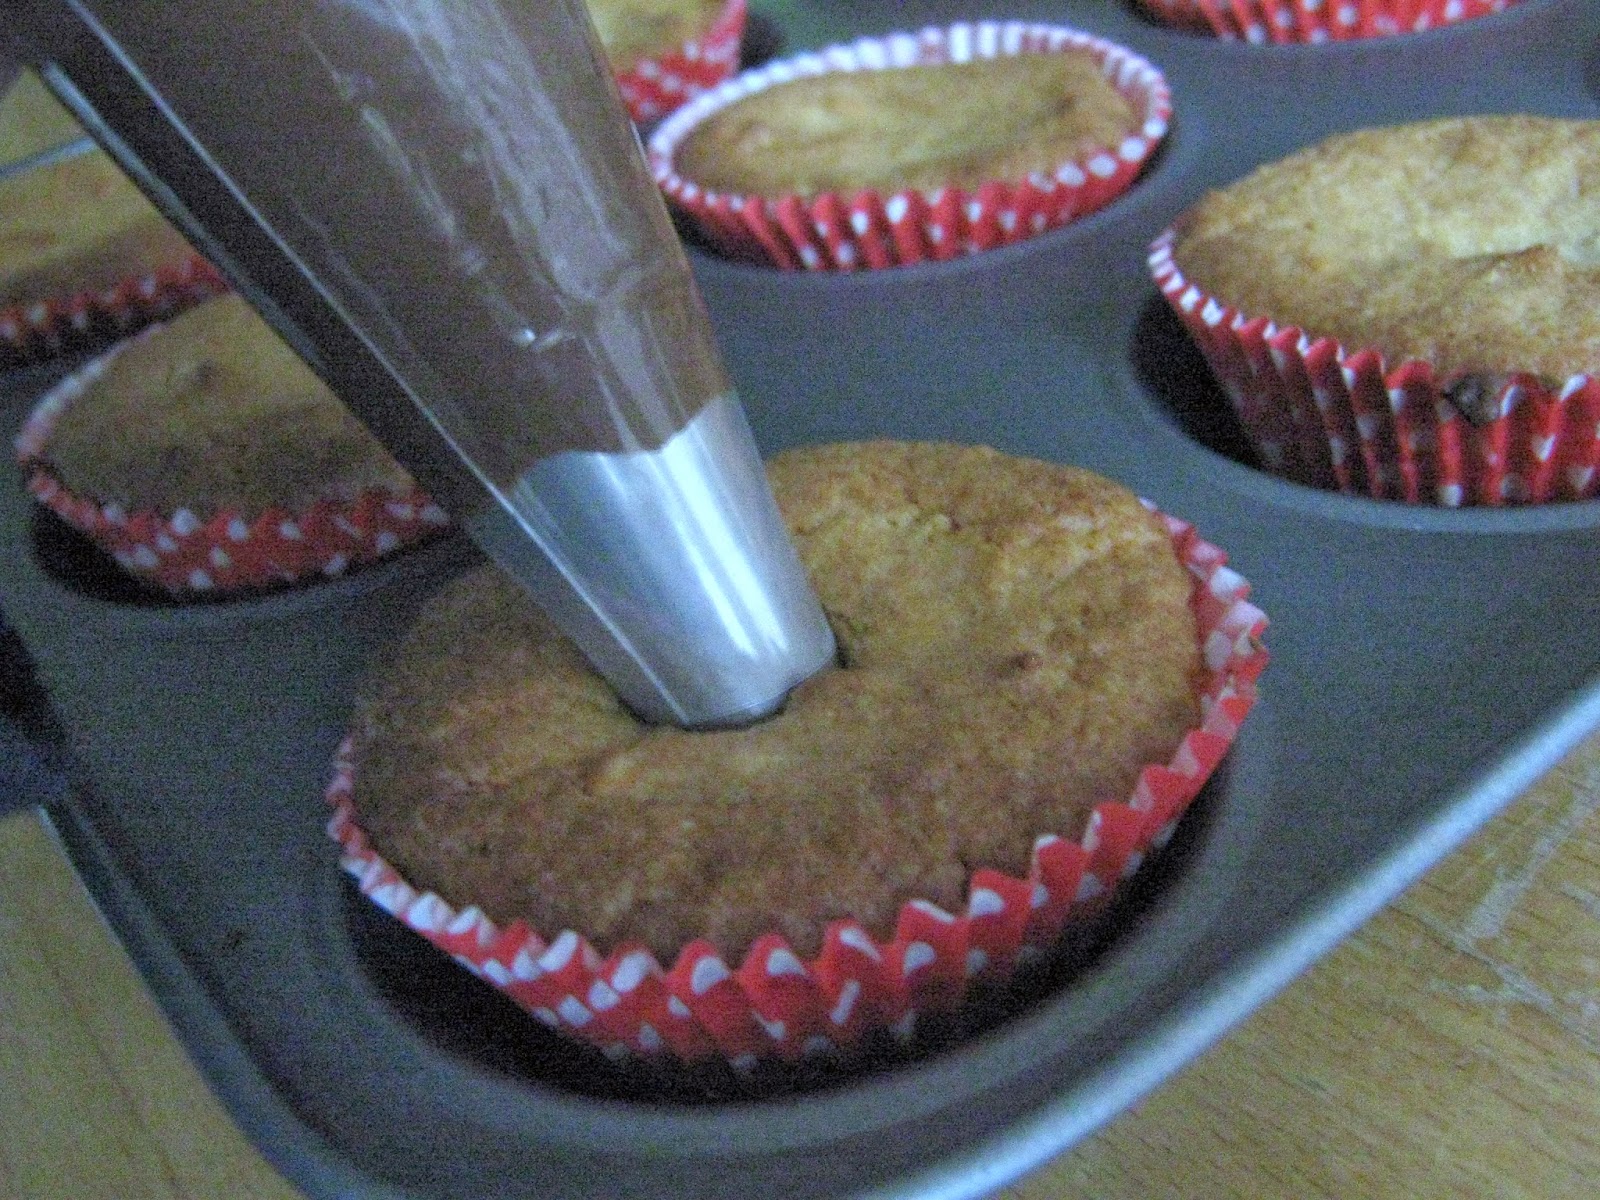
Remove them from the oven, and wait for them to cool slightly before piping in the Nutella filling. You could wait until they have completely cooled, but I like mine to melt a little and go all gooey. Fill a piping bag with a nozzle and your chocolate spread, and push the nozzle into the middle of a cake to fill it with Nutella.

Peanut Butter and Chocolate Cupcakes

You could fill the cakes with buttercream, or any filling you like, but I quite like using Nutella, as it gives it a taste like Reece's Peanut Butter Cups (so yummy).

All that's left to do now, is to enjoy your lovely cupcakes. If they aren't all eaten in an hour, keep them in a dry, airtight container, and they should last for a few days.


Peanut Butter and Chocolate Cupcakes
YUM!
Let me know if you try this, or if you try any variations of this recipe - I'd love to hear them!


Thursday 13 February 2014

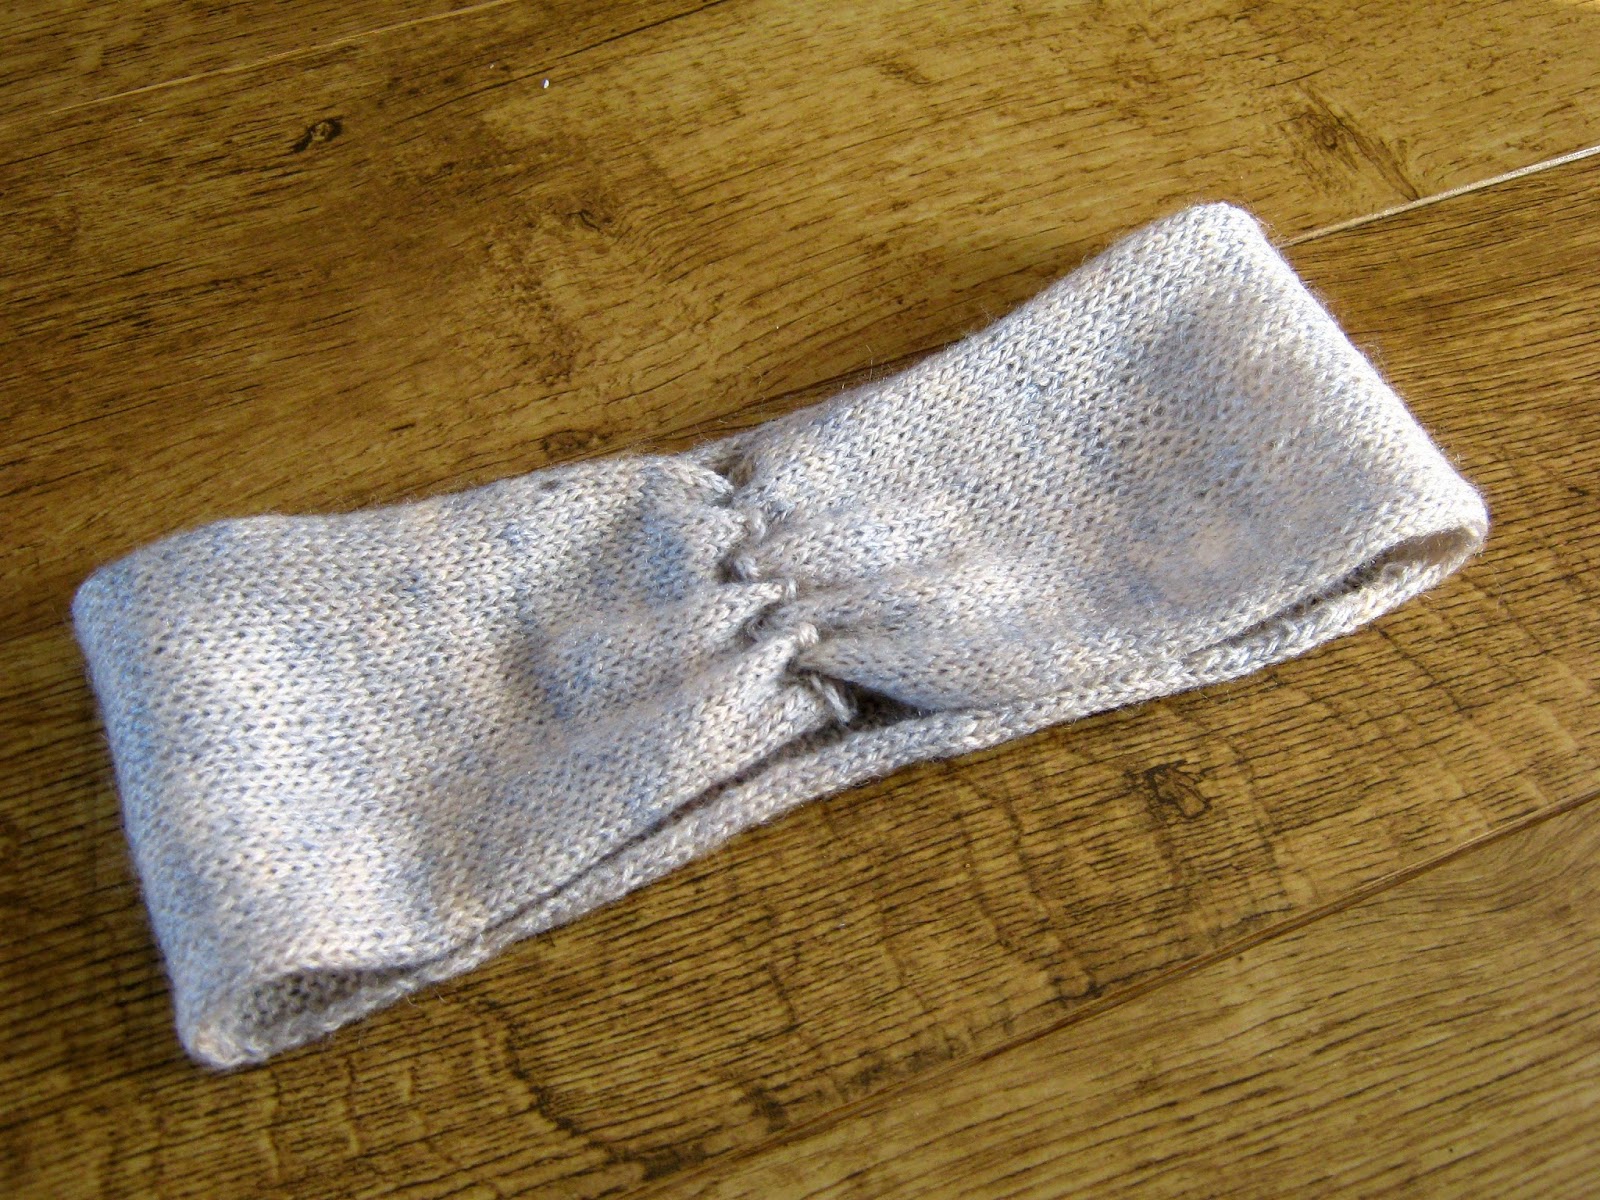
Free Knitting Pattern: Turban Headband

First up, I hope you're all well and haven't been too affected by the storm. The electricity has been flickering, and we had no water this morning, but apart from that we haven't been hit too badly here.

This weather has me reaching for my warmest clothes, and all my warm winter woollies - hats especially, as the cold winds are particularly bitter. I fancied switching it up though, after months of wearing knitted beanies, and decided to make a knitted headband. The best thing about a knitted headband, is that there is an option to wear your hair up or down, and still keep your ears nice and toasty.

Free knitting pattern turban headband


Free knitting pattern turban headband
 
This was one of those projects, that whilst really simple to make, seemed to take forever to finish. It is a very plain pattern, with no intarsia or cabling, and in hindsight I would probably add either one or the other, just to make it a little more interesting to knit. I think I was also affected by the fact that it has been a long time since I knitted with 4-ply wool, and at first it seemed like I was knitting using candyfloss and cocktail sticks. I'd forgotten how lovely thin wool is when knitted up though - so soft and tactile, that the knitting time was definitely worth it.
 
You will Need:
  • 100g 4-ply wool of your choice
  • 3mm knitting needles
  • A sewing needle
Abbreviations:
  • K - Knit
  • P - Purl
  • St(s) - Stitch(es)
Knit side is the right side, although you could choose to use the other side if you wanted.
 
Cast on 30 sts.
Row 1: K across (30)
Row 2: P across (30)
Repeat working in stocking stitch, until your knitting fits comfortably around your head. The best way to test this is to hold your knitting around your head, and see if it fits as you would like it to. You could measure around the circumference of your head, but I wanted mine to fit around to the base of my head. Make sure not to make it too tight or too long, or your headband won't be comfortable.
 
Cast off in your preferred technique.
 
If you find that the sides of your knitting are curling in (mine were), gently run over your knitting with an iron. You want it to be quite warm, but not overly hot, or your knitting will become felted (unless that's the look you want - experiment!).
 
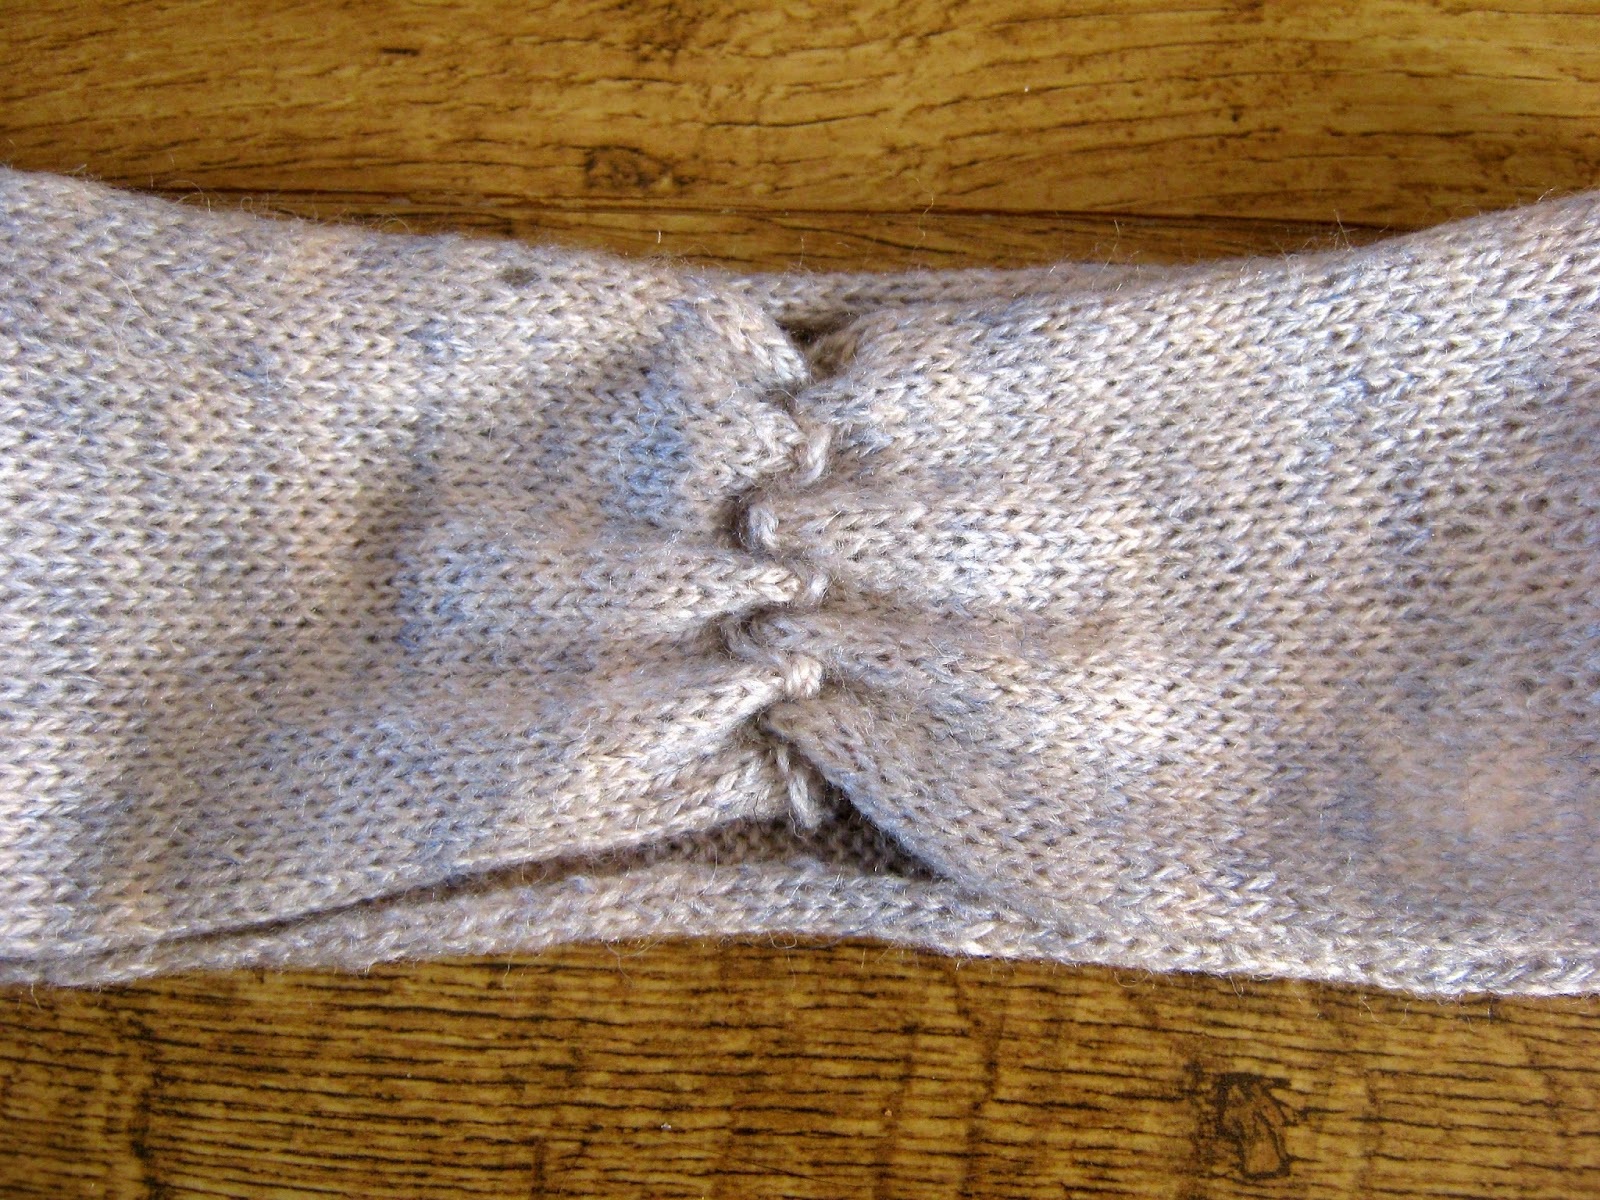
To sew up, fold your long rectangle in half, right sides facing, so that the cast on edge and the cast off edge meet, and a loop is formed. Using a big sewing needle and some of your wool, sew a running stitch through both of these edges, and pull tight to form your turban's gather. Tie off your wool, and turn the right side out.
 
Free knitting pattern turban headband
The running stitch gather

Free knitting pattern turban headband


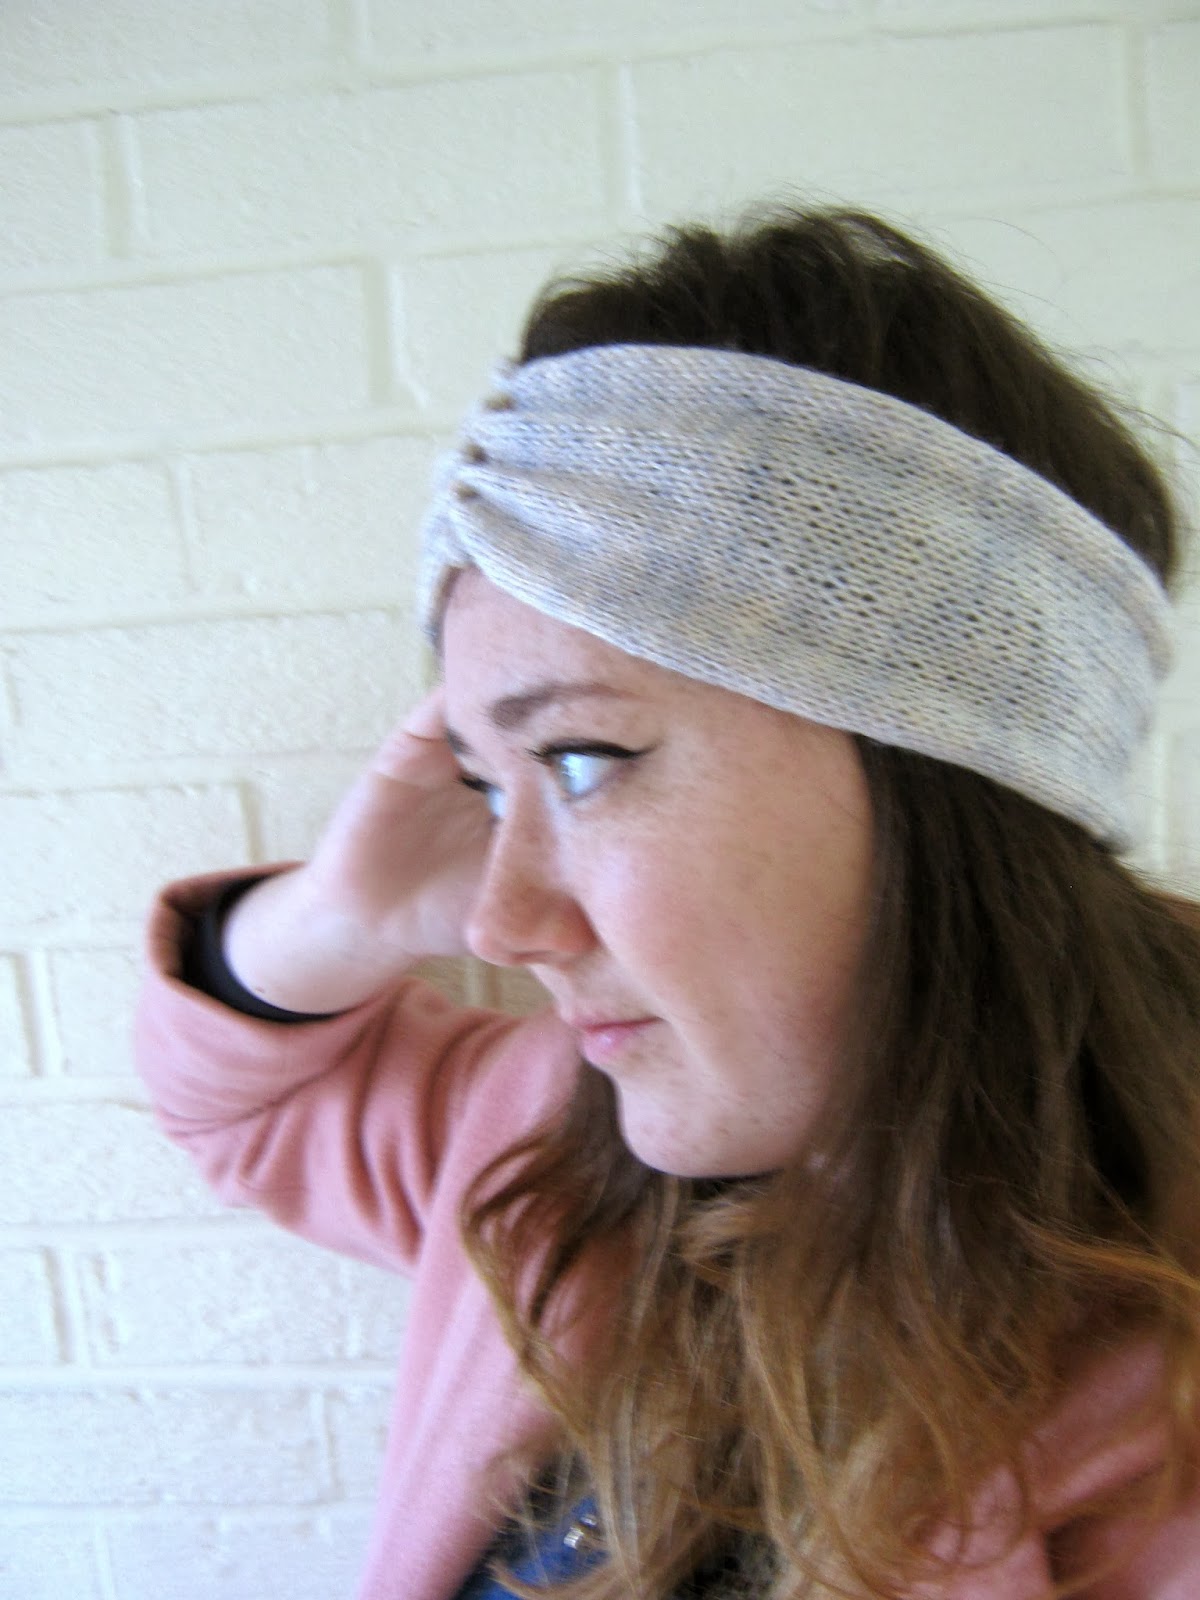
Free knitting pattern turban headband
This photo makes me cringe, big time
 You could easily adapt this idea, and make your headband in a thicker wool. I'd actually recommend a thin wool though, even though it takes a long time to knit up, the fine knit finish is worth it.

Free knitting pattern turban headband
 
I actually quite like the simplicity of the finished design, but you could add other elements to it by using specialised wool, or working in stripes perhaps. Add a byzantine touch and wear a fancy brooch in the middle of your turban. Choose a colour that complements the colour of your hair - I think it would look great in jewel tones, emerald and ruby shades, as well as more natural colours.
 
Let me know if you try this (especially if you tweak it slightly - I'd love to see photos!), and if you have any questions about the tutorial, please post a comment and I'll try my best to help you.


Wednesday 12 February 2014

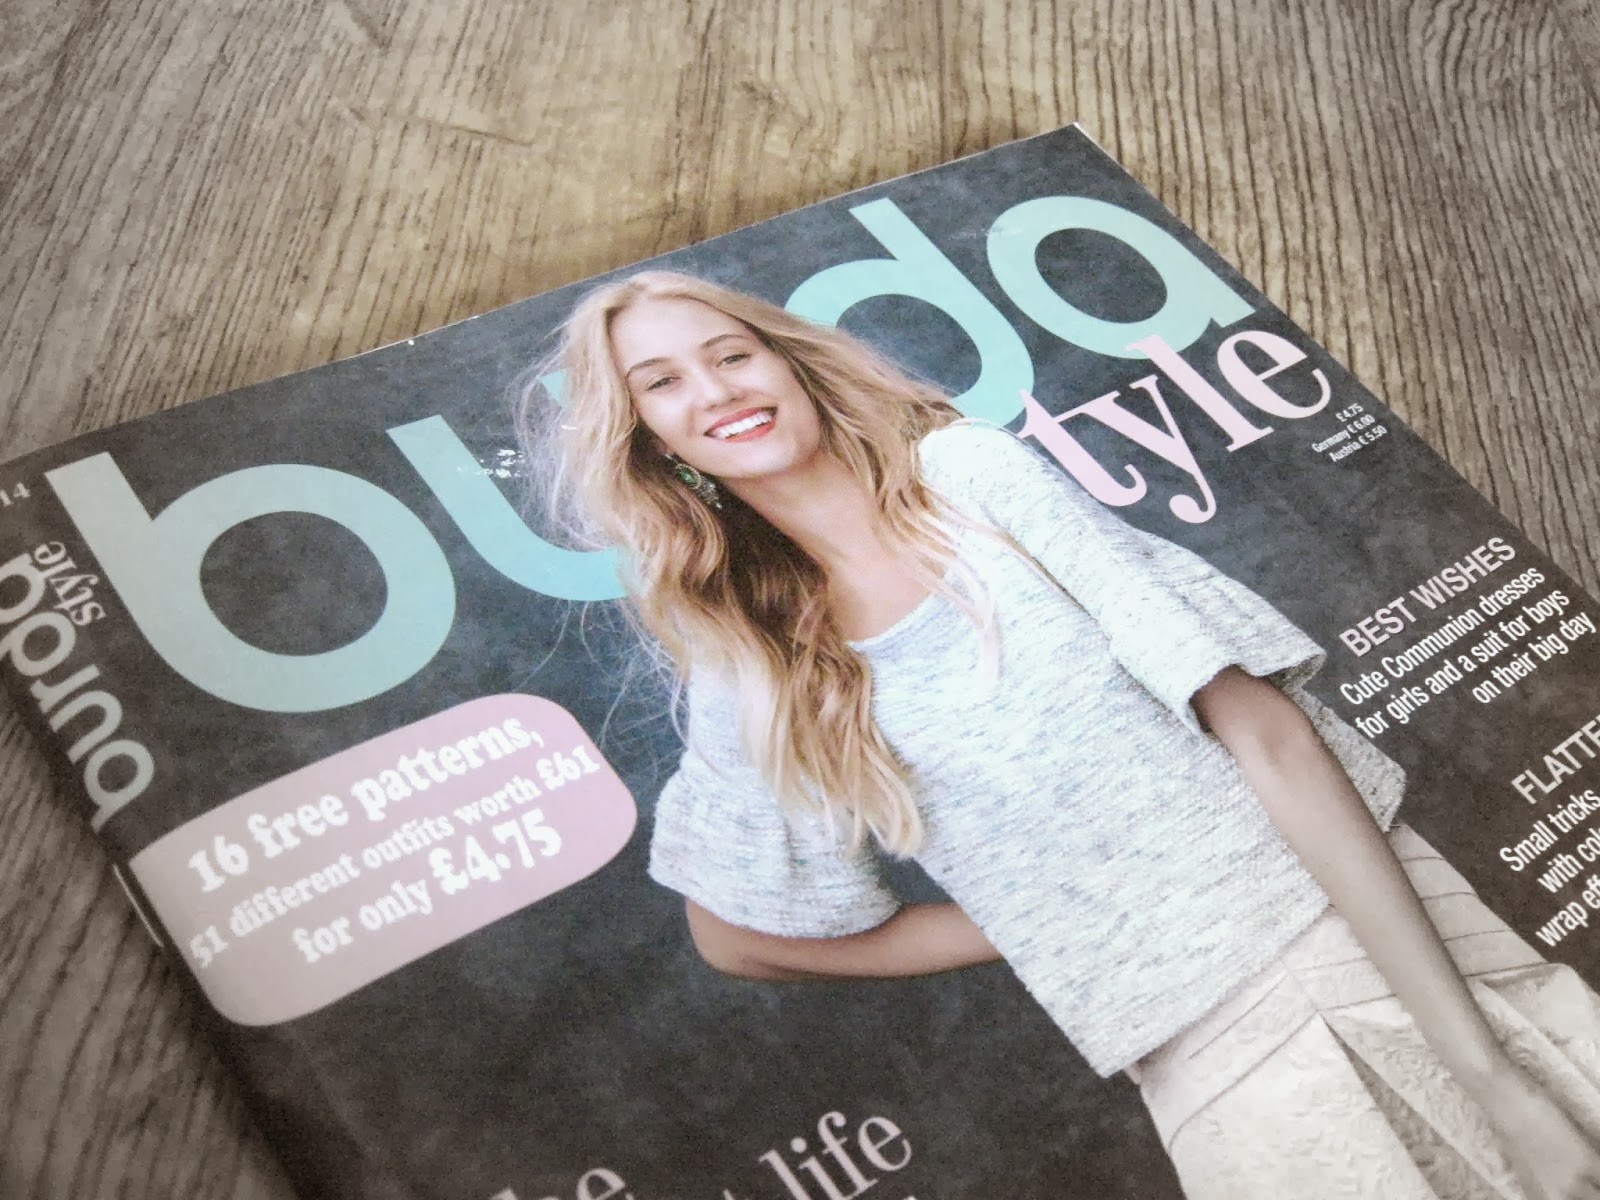
Burda Style Magazine

Although I love reading magazines, I don't have a subscription to one. The main reason for this, is that I often just pick a magazine based on how I'm feeling that day, and the articles that are in each magazine. This means that I read quite a range of magazines, some you might expect me to read(Company, Glamour, Mollie Makes), and some are a little more surprising (National Geographic, The Economist). It just depends on whether I'm feeling creative, highbrow, or in need of some pretty photo shoots.

Sometimes, I'll buy a magazine as a kind of incentive to do something, especially a craft based magazine. As I've been itching to get sewing recently, I treated myself to Burda Style Magazine, a super comprehensive dressmaking magazine. If you're interested in sewing, or dressmaking, I'd truly recommend it.

Burda Style Magazine February 2014

Burda Style Magazine February 2014

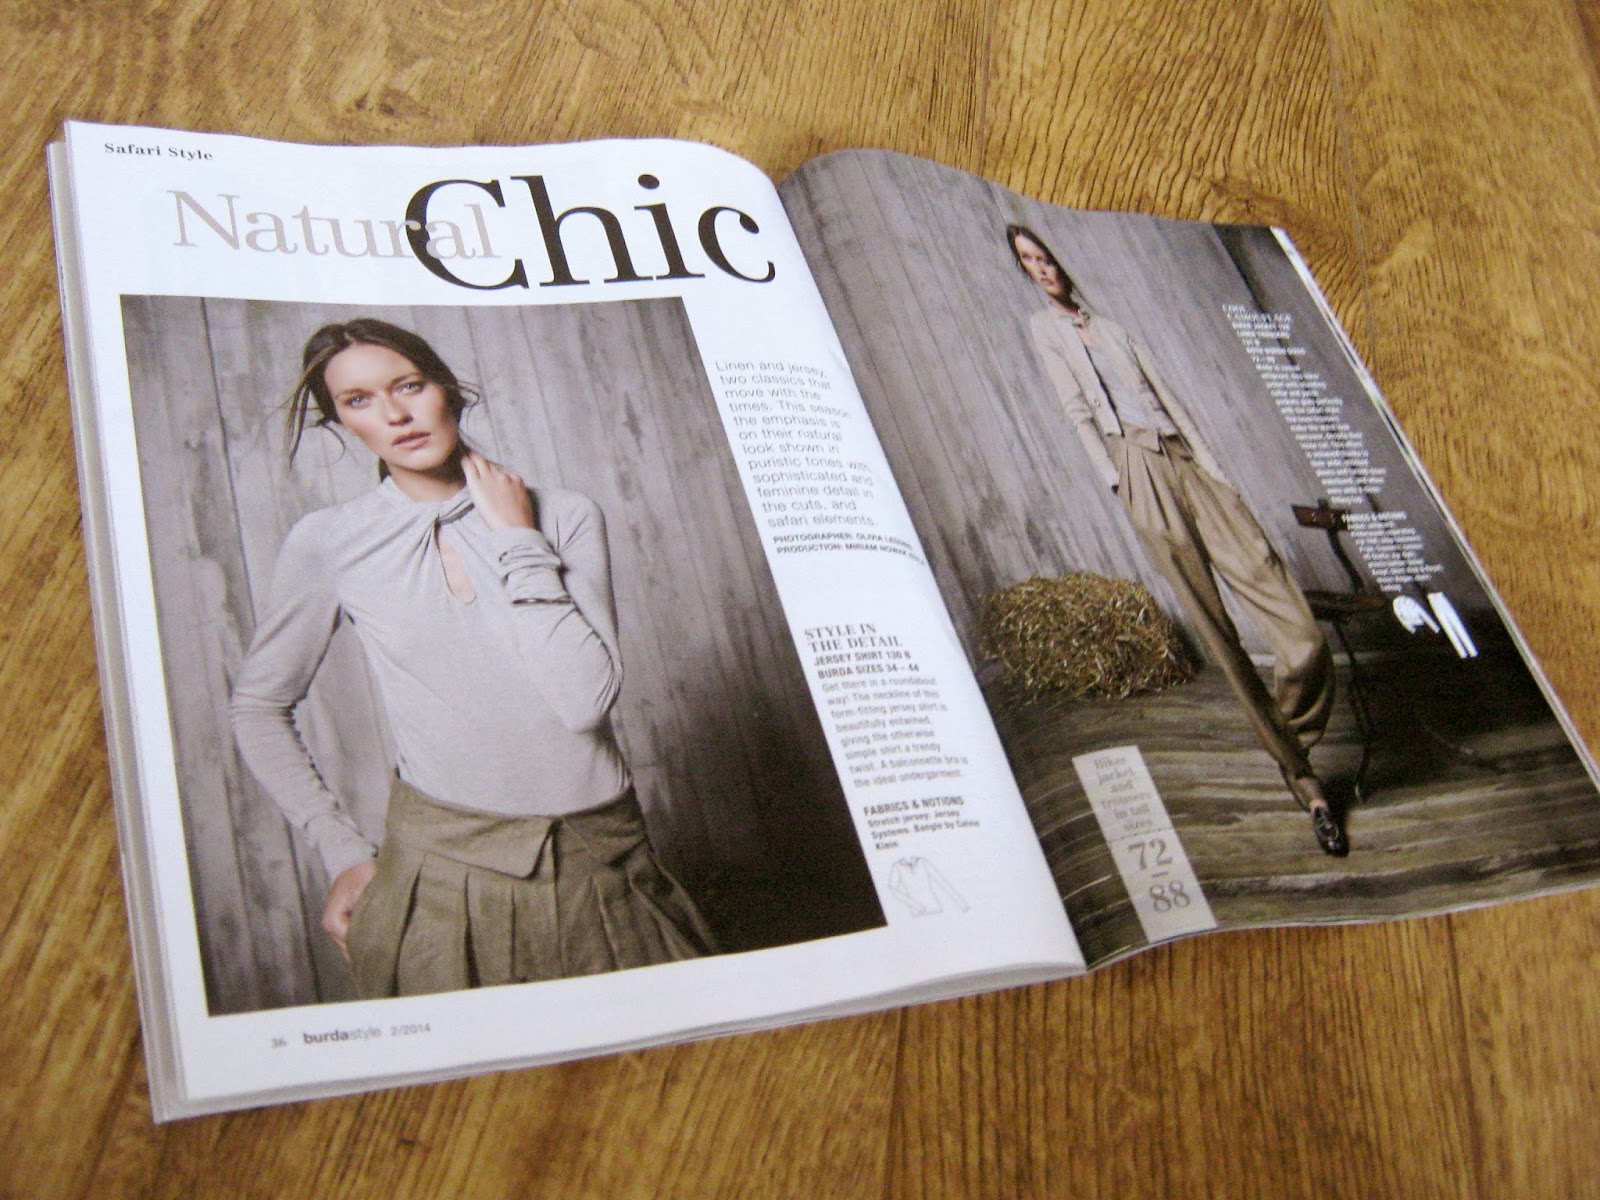
One thing that I really like about this magazine are the several photo-shoots included in each issue. They really help me to envisage how one pattern can be made in several different ways, and in different fabrics, whether your style is girly, rock 'n' roll or minimalistic.

Burda Style Magazine February 2014

Burda Style Magazine February 2014

As well as the lovely photo-shoots showcasing the sewing patterns included in the magazine, there are several pages of ideas on how to customise all ready existing items of clothing, taking inspiration from the latest catwalk shows. Which, if you're a complete sewing novice, is a great way of easing yourself into dressmaking. Also, each pattern has a difficulty rating, so you know beforehand whether the pattern is suited to your ability. You can mark your progress by working up to the higher rated patterns (one day I will sew a coat!).

Burda Style Magazine February 2014

At £4.75, it's hardly the cheapest of magazines, but after considering that individual sewing patterns from the Burda website cost an average of £2.99, and that in this issue you get over 16 sewing patterns, the maths does itself. Another plus, there are absolutely no adverts throughout the whole magazine (trust me, I double and triple checked). Which is great, because most fashion glossies have pages and pages of adverts before even the contents page. It means there is more room for the things that matter.

I'll definitely be buying Burda Style on a more regular basis, especially because I find that fashionable sewing patterns are hard to come by.

Are there any sewing or craft magazines that you'd recommend? And does anybody know what happened to Cloth Magazine? I used to really like the wide variety of crafts included in this magazine, especially the mix of sewing patterns, jewellery making and customisation. It seems to have vanished from publication within the last year or so, which is a shame because it was a magazine which always inspired me. Anything you'd recommend in the place of Cloth Magazine?

Monday 10 February 2014

Why Not Try to DIY?

For once, I haven't actually got too many craft projects on the go. Apart from a piece of knitting that seems to be growing about 2cm every week, that is. So, I think some DIY inspiration is just what I need to get my creative juices flowing. I want to get back into sewing especially, but I'm open to pretty much anything at the moment. Here are some things I'm longing to make at the moment.


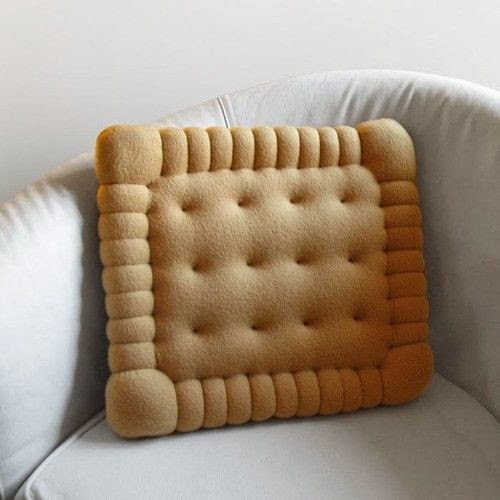
Biscuit Cushion
Source
I like this biscuit cushion for many reasons. The main one, is that it reminds me of those huge, oversized classic biscuits you can get from Costa. The custard cream ones are amazing. I'd love to sew a few of these in different, iconic variations. I think if you choose the right fabric, the sewing should be easy enough - sew a basic biscuit shape, and then using thread of the same colour as your fabric, use quilting techniques to add more detail. They'd look great in a café, or maybe even in your dining room.


Globe lightshades
Source
If I had a study, I know I would attempt to make these globe light shades. You can pick up modern day, plastic globes very cheaply, but I think this would look best with old-fashioned globes. So far as I can tell, you'd have to split the globe in half, and drill a hole at the top of each half to fit the light fitting. You could use smaller globes (they have had some recently in The Works), and the same technique to make lamp shades for desk lamps, or bed side cabinet lamps. If you're a keen traveller (or know one), it would be an interesting idea to use a monochrome globe, and then colour in the countries you have visited using paint.


Dandelion Seed Ring
Source
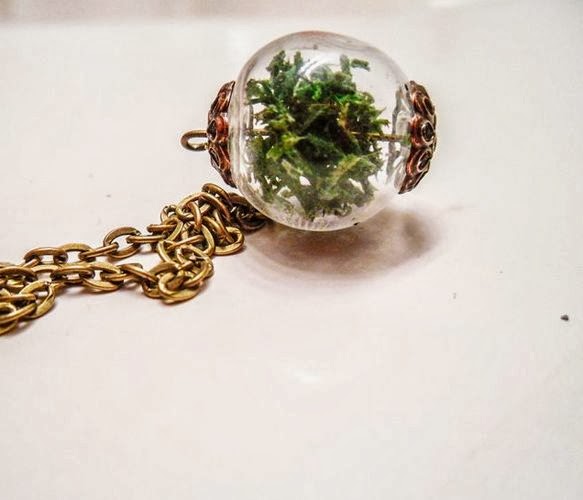
Terrarium Necklace
Source

It feels like it's been a looooong winter, so these natural jewellery pieces, containing real plants, have caught my eye. The most straight forward way to do this, would be to place the plant part of your choice into a mould, and then pour in clear resin. I've never used resin before, so I think the way I would do this would be to look for a small glass dome in a jewellery findings store, insert my plant part, and then secure in place by adding jewellery findings. I think this idea would make some great earrings, perhaps using daisies. Does anybody know where I'd find the right kind of fittings to make this with?

How do you get yourself out of a creative rut? Have you ever done anything similar to these projects?

Saturday 8 February 2014

Bonjour Beanie Hat

This is a project that involves two things I've been experimenting with recently; crocheted chunky wool and embroidery. After knitting this hat with my own chunky wool, I decided that it needed a little something extra. And so, I embroidered "BONJOUR" onto the front, using grey wool and chain stitch. I'm definitely no embroidery expert, but even I could cope with chain stitch.


I added a pom-pom in the same colour as well, to make the hat a little more coordinated. And because I'm obsessed with pom-poms. I've even considered making a pom-pom scarf (or garland), I'm that obsessed.


My chunky wool knitted up better than I expected; I thought that the crocheted chain would leave an odd texture on  the finished garment, but it actually turned out fine. It was strange knitting with knitting needles that were so large - I felt like I had shrunk! I normally knit with Aran wool at the very thickest, so it was a pleasant surprise to find how quickly this knitted up. It only took me two days to finish knitting the hat, and I'm not the quickest of knitters.

After this, I can't wait to try out more embroidery. Do you have any ideas for an embroidery project?

Thursday 6 February 2014

Vintage Clothes Haul

One thing that is good about where I live, is that there are not many people into vintage clothes. Sure, if I wear too many of my vintage items at once when popping down town, I stick out like a sore thumb. But what it does mean, is that I can sometimes find some vintage gems for a bargain. If I lived in a vintage hot-zone, I could almost guarantee that I would be paying more than double what I normally do.

One reason for this, is that I never buy clothes from "Vintage Stores". We only have one locally, and that only opens on Saturday (rather telling of the local style, no?). Whenever I do go in, I always find myself thinking "This is the exact same stuff I find in second hand shops, but far more expensive!" Putting in the (wo)man hours to trawl the local second hand shops is worth it, even if I do only find one amazing piece every so often. Today, the planets aligned and the Vintage Gods smiled down on me, as I found a couple of lovely pieces.

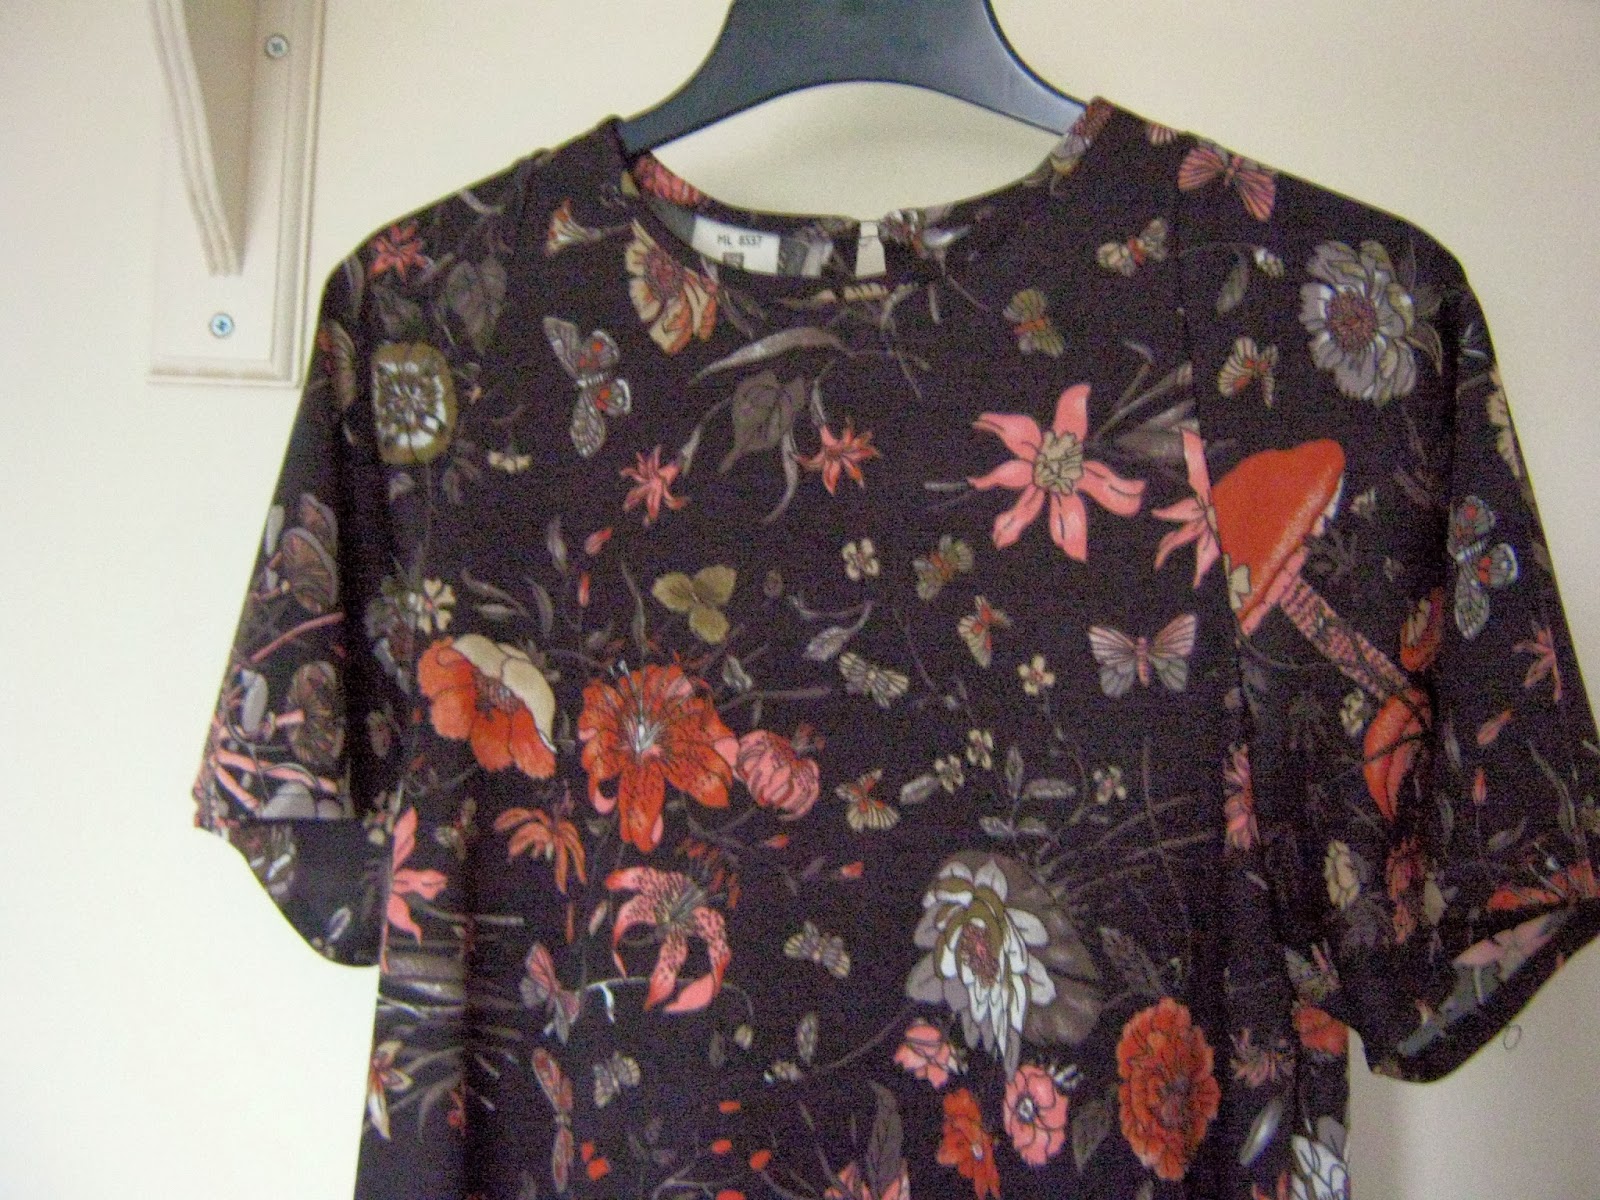
70s midi mushroom patterned dress

70s midi mushroom patterned dress

70s midi mushroom patterned dress

I love the Japanese vibe of this 70's midi dress. It's the kind of thing that I could imagine Florence Welch wearing on stage, no? It's made of 100% knitted polyester, so probably not actually. Not unless she felt like self-combusting from the heat. So, I probably won't be wearing it in the heat of summer. I think it actually has a more autumnal feel anyway, with the mushroom pattern on it. Oh, and it has pockets. That was what was actually the deal-maker. I love pockets. It cost me £2.99, a lot of dress for my money. I can see me wearing this with black Chelsea boots, long layered necklaces and with my hair down. And if I could carry it off (probably not), a black, wide brimmed, felt fedora.

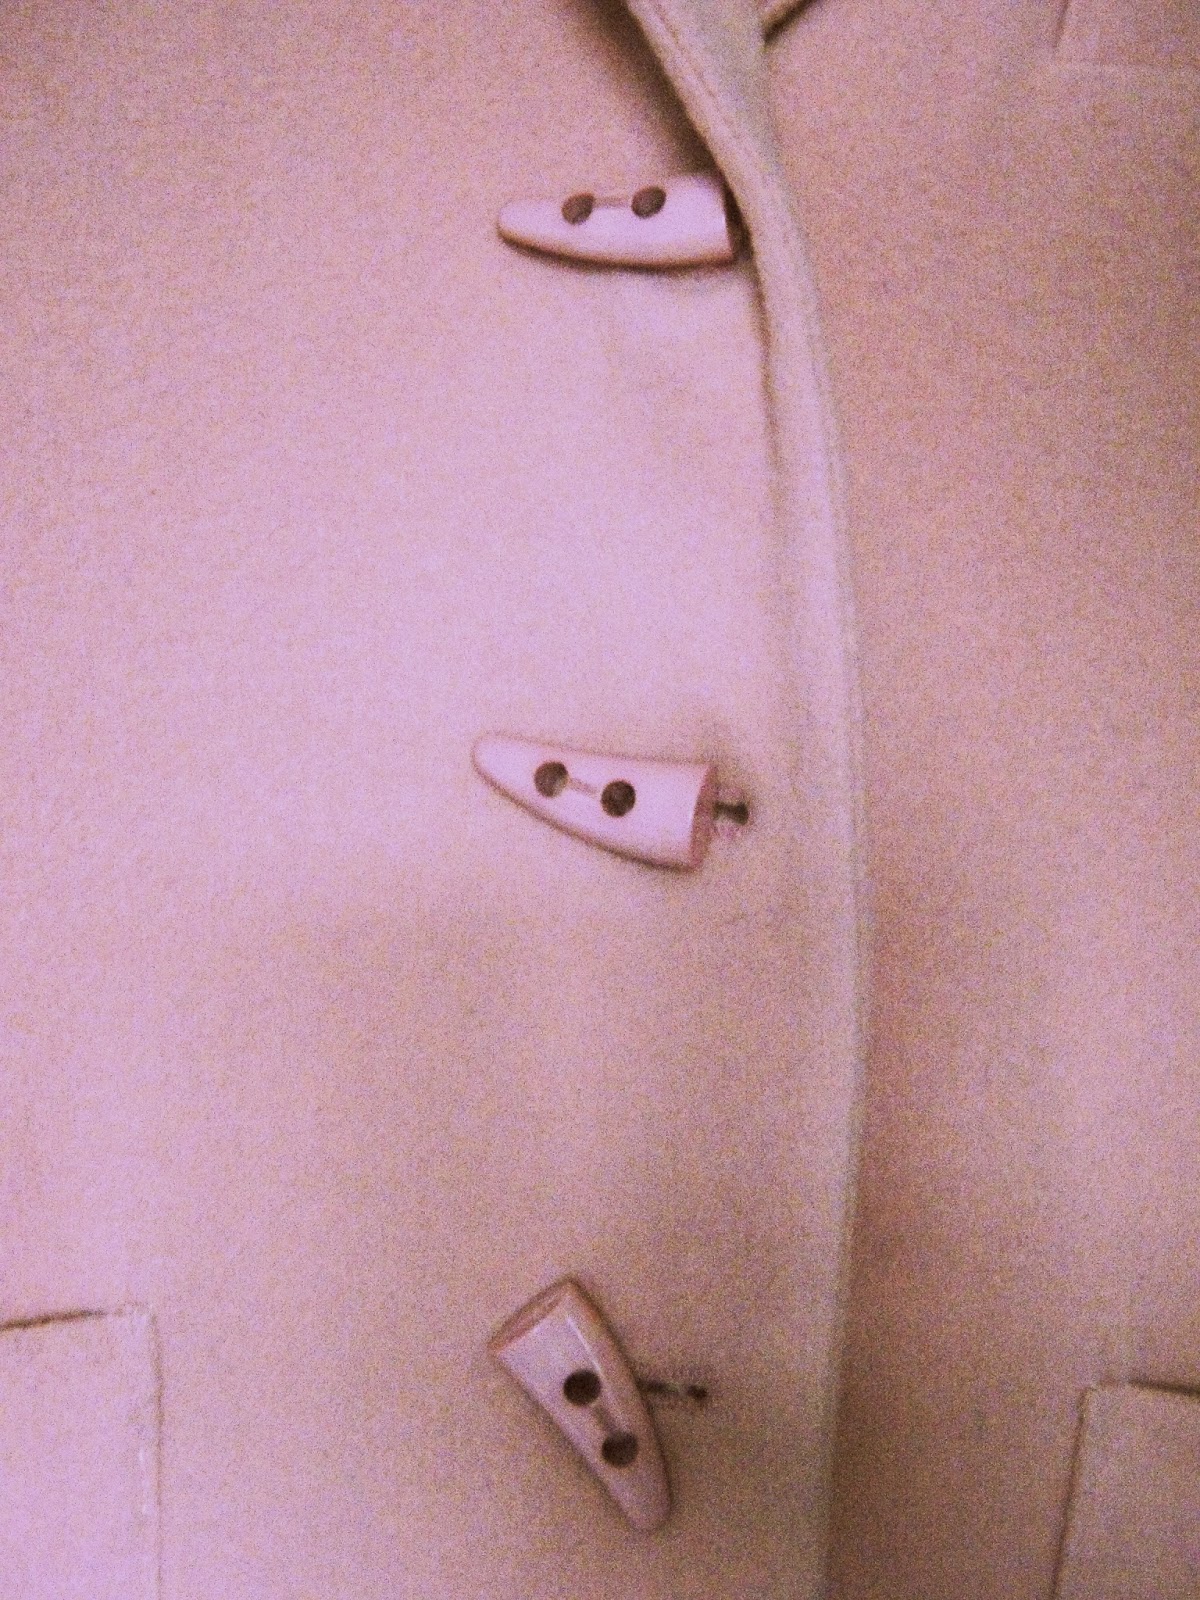
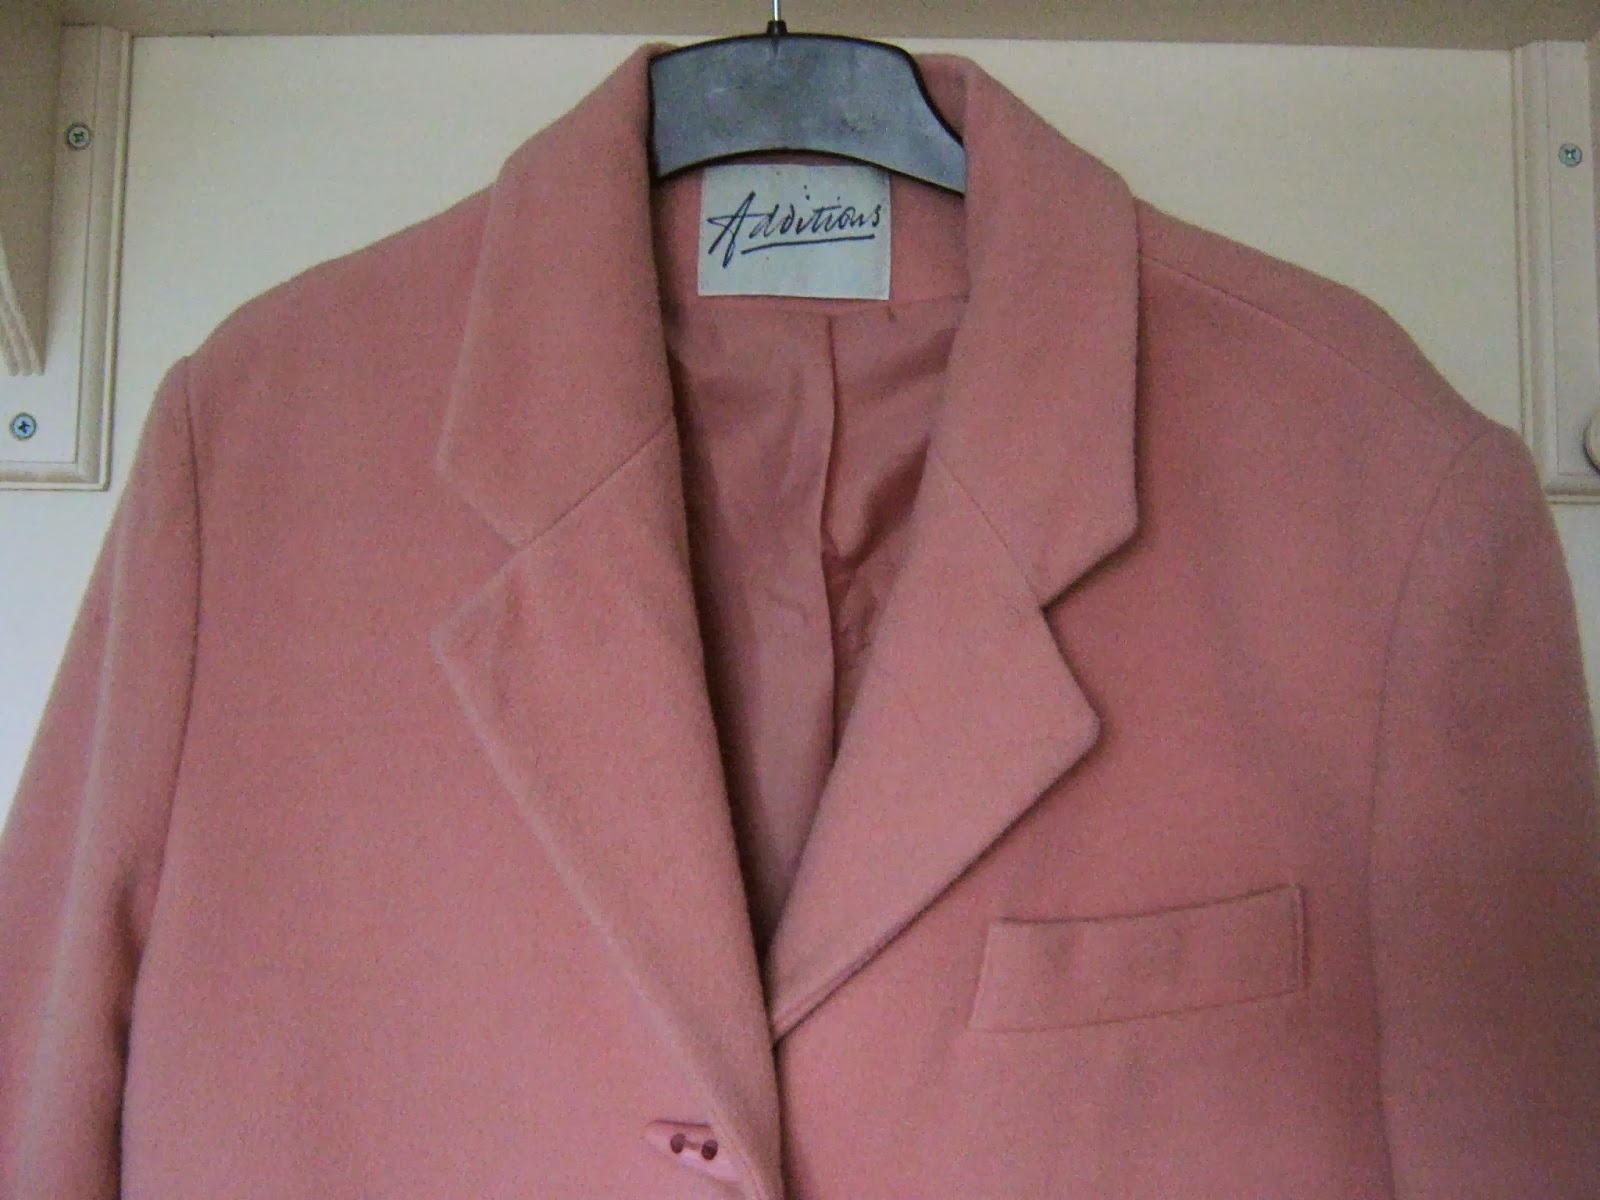
Vintage Pastel Pink Cocoon Coat

Vintage Pastel Pink Cocoon Coat

Vintage Pastel Pink Cocoon Coat

I've been dreaming of pastel pink coats for a while now. This just proves that sometimes, it's worth holding out for that perfect item, at the perfect price. This one was a snip at £4.99. I love the pastel colour, the oversized cocoon shape, and the toggles (who doesn't?). Even though it's been raining pretty much every day for the last month, and this coat doesn't have a hood, I might have to wear it anyway. It's such a happy colour. Oh, and it has several pockets. Have I mentioned how much I love pockets?

Where are your favourite places to shop? Do you like vintage, or are you more of a modern dresser?