Monday 30 December 2013

It's Sale Season!


I remember in school years ago, we had a debate about the "January Sales". It made me think about them in a new light - fighting your way through hoards of customers, seeing items that you bought for Christmas presents now reduced to a ludicrously low price, the low cost of items leading to you buying items you don't need... the list goes on. I know from past experience that I'm definitely partial to buying things I don't need just because of the low price. Even so, every time the sale season starts, I still get excited - the cheapskate in me just longs to find a genuine bargain. Here's my pick of the best:

River Island


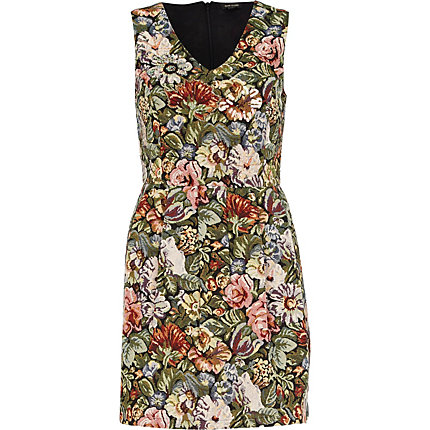
Green Tapestry Shift Dress now £25

It might be a bit of a rummage and a bun fight, but I like the River Island sale - they have genuine stock that has recently been in store, and at rather tempting prices. If you're prepared to put in the time and effort sorting through it all, you're bound to come across something lovely.

Topshop
 
Silver Mary Janes now £15

Although I love Topshop, I'm actually not a very big fan of their sale. Is it just me, or does it seem that all the stuff in the sale is from so long ago that I don't actually remember it ever being in store? Having said that, you can sometimes find a gem amongst all the micro crop tops and patterned leggings, and the jewellery sale is always amazing.

Dorothy Perkins

Grey Cat Eyes Jumper now £15

Dorothy Perkins have a decent sale pretty much all year round, so be sure to keep an eye peeled for any discounts throughout the year. Theirs is also probably the most organised sale around, arranged in sizes, price and type of garment - when sale shopping is so easy, it's rude not to!

5 Top Sale Tips
  • Don't ever buy anything on the premise that you are going to alter it. Chances are, you won't. I actually put off sewing a button back onto a shirt for months, so the odds of me actually doing any drastic alterations are slim to none.
  • If in doubt, try it on. No, the changing rooms aren't going to be much fun, but it'll be far less effort than taking your "bargain" home, finding it doesn't fit and then returning it. Trust me.
  • How many ways could you wear it? Does it fit in with the rest of your wardrobe? If you can't think of more than 5 ways to wear it, using items you already own, then it probably won't be a piece you'll hold onto for very long.
  • Don't be dazzled by reductions. It sometimes helps to ignore the full price of the item, instead asking yourself if you would pay the sale price as if it were the full price. It doesn't matter how much the reduction is if the item is still more than you would like to pay.
  • Not sure about something? Walk away. Give yourself time to consider the purchase. If you're still thinking about that item in a days time, then the chances are you'd regret not buying it.     

Do you have any tips for shopping in the sales?

Wednesday 25 December 2013

Merry Christmas for 2013


Here's wishing all of you a very merry Christmas. I'm still hoping for snow, although I don't think we're getting a white Christmas this year. Instead, I'll be eating copious amounts of food and watching cheesy TV whilst wearing my pyjamas.

Merry Christmas!

Sunday 22 December 2013

How to: Whimsical Kissing Reindeer Necklace

I wanted to make a fun Christmas themed necklace, but also wanted it to be versatile enough to wear all year round. This was the result - a cute, romantic reindeer necklace that is easy to make, and super whimsical to wear all year round.

Kissing Reindeer Necklace

Kissing Reindeer Necklace

You will Need:
  • 2 small plastic reindeer
  • A small twig
  • 2 jump screws
  • 2 jump rings
  • Necklace chain
  • Small wire stemmed flowers
  • Glue
  • Pliers
Kissing Reindeer Necklace

Kissing Reindeer Necklace

Glue your reindeer to the centre of your twig. Make sure it looks like they are kissing!

Kissing Reindeer Necklace

Wrap the stems of the flowers around the branch. This is an optional step - I did it to hide my messy gluing, but if you are a tidier gluer than me, you could skip this. You can find a wide variety of wire stemmed flowers like this in cake decorating shops.
Kissing Reindeer Necklace

Cut your necklace in half, and attach each end to a jump screw using a jump ring. Then, screw your jump screws into the centre of each reindeer's back. Mine were made out of a really soft plastic, but if yours are a bit more well made, you may require a drill to do this.

Kissing Reindeer Necklace

Kissing Reindeer Necklace

Now all you have to do is enjoy wearing your reindeer necklace. It would look great when worn as a statement necklace with a dress or under the collar of a shirt. Or pimp up the Christmas factor and wear it with a Christmas jumper.

How are you accessorising this Christmas?


Friday 20 December 2013

How to: Personalised Name Book Binding

This is a project that I promised a tutorial for a while ago, but only just got around to photographing over the past couple of days. I originally made a personalised journal out of a vintage astronomy book, but this time I'm using this cute book with dogs on the front.


I made this one for a friend's birthday, but these would also make a great personalised Christmas present (if you've got the time to make one over the weekend, that is).

You Will Need:
  • A vintage hard-backed book
  • Paper in a colour of your choice
  • Craft Knife
  • PVA glue
  • Quick drying varnish
  • Washi Tape or a strip of fabric
  • Awl
  • Pencil
  • Needle and Embroidery thread
If you're going to undertake this project, I'd recommend being fairly acquainted with Coptic stitch before you start. Get some practise making notebooks with a simpler spine design, and then you should be ready to try this.


I've made my signatures out of A4 cream and white paper by folding them in half. Mine are 8 pages per signature (or 4 sheets of folded A4), but you could do more if you want. I recommend a minimum of 10 signatures for this - you'll need a few so that you have enough space to fit a name on. I then used a craft knife to trim them to the size of the book I was using.


Then, use a craft knife to gut your book, so that you are just left with the front and back cover. Save the innards though - you never know when you may need some old book pages.


See? I've used some of the pages from the book to line the book covers with. If you are going to do this, use PVA glue, and try to match up the scruffy ends with each other. An optional extra at this point is to varnish both the outside and inside of the book covers - I like to do this just to make them a little bit more hard wearing.


You can use washi tape, or even a strip of fabric to hide the scruffy ends of the covers, where they were cut away from the book.

Now you can start designing the pattern of your spine.


 Whilst holding your signatures tightly together (or using a book press) draw a vertical line on each end of your spine, 2cm away from the bottom and top. The space inbetween these two lines is where your name will be, so use a pencil to lightly sketch the name onto the spine, making it central by beginning at the centre of the spine. To make things simple, take care to ensure that the signatures now stay in this order, or your design will get muddled up.


 Now use an awl to make holes in each signature according to your design. Each hole should be where your pencil marks are along the spine.


 Make 2 holes in each of your covers as well, 2cm from the top and bottom, and 1cm in from the edge. Make sure you do this on the inside edge of your covers.

 Now you can begin to stitch your spine together, using the same technique for a standard Coptic stitch binding (check out my Coptic stitch tutorial if you need a reminder).


The only difference is that you might find yourself having to do some more irregular binding to keep the shape of the letters.


In the above picture, I am actually binding two signatures at once, instead to just doing one at a time. I had to do this for the first two signatures because, unlike the vertical lines, the letters are not attached to holes in the bottom cover. Once the first two signatures are done, things should get a bit simpler.


Some parts of the binding are also back stitched - particularly horizontal lines like some parts of the "E" and the top of the "T".


Stick with it, and you'll start to see your letters take shape. Finish off your binding in the usual way, by binding your front cover and your last signature to the main spine at the same time.


This can be quite a time consuming process, but is totally worth it for a unique personalised gift. Or you could just be really selfish and make one for yourself (I won't judge you).

Let me know if you try this (or have any questions). I would also love to see any photos if you try this.


Tuesday 17 December 2013

Handmade Christmas Cards - Three French Hens

Whilst most people had already bought and posted their Christmas cards, I still hadn't checked whether I'd bought any last year or not. Long story short - I hadn't. So, (deep breath) I decided to make my own. I don't (read: never) usually do this, but it just happened that I had a Christmas themed drawing that I wasn't overly ashamed of, and time to scan it into the computer.


All I did was scan my drawing into Photoshop, changed the size and then printed it out. I added the text on Photoshop, as well as a little additional shading.


I guess the ship has long sailed for me to offer these as some kind of free printable, but there's always next year.

Have you ever made your own Christmas or birthday cards?

Sunday 15 December 2013

How to: Homemade Mince Pies

As soon as the mince pies come out, it really does begin to feel like Christmas. I'm not even calling this a recipe, it's that basic. Paul Hollywood and Mary Berry would probably cringe at my rather rustic, lop-sided mince pies, but they taste yummy all the same.

Christmas Mince Pies

I'm using homemade pastry for this, but feel free to use shop bought pastry. I didn't measure the ingredients for my pastry (shock horror!), instead I just mixed plain flour with butter and a drop of water until the consistency felt right. Short-crust pastry is the norm, but puff pastry is scrummy too.

First up, roll out your pastry on a flour-dusted work surface. Make it about 1 - 2cm thin and cut out your pastry cases using a round cutter.

Christmas Mince Pies Pastry

Put some cake cases in a cup-cake tray and place your pastry cases into the paper cases.

Christmas Mince Pies Pastry

Put some mince-meat in each pastry case, not quite filling each case to the top.

Christmas Mince Pies Pastry Mince Meat


Using your remaining pastry and some novelty cutters, place a festive shape on the top of each mince pie. I'm using stars and fir trees, but go with whatever you feel like.

Christmas Mince Pies Pastry Toppers

Bake in the oven at 160 Degrees Celsius for 25 minutes or until the pastry is golden brown. Wait until they have cooled, then remove from the paper cases and lightly dust with icing sugar.

 Eat whilst dancing around your Christmas tree whilst singing Christmas carols. Or whilst watching the Great British Sewing Bee Christmas Special on the telly. Did anyone else watch it? I want to make everything.

Christmas Mince Pies

 Do you have any favourite Christmas treats?

Thursday 12 December 2013

How to: Christmas Wordsearch Wrapping Paper

If you're like me, you're only just seeing the end of your Christmas gift shopping in sight (I still have a few more things I need to get, but nothing too major). But what then? Figuring out how to wrap your presents, of course. I usually buy a gift bag and lump everything in together - a saviour for lazy gift givers like me. This year though, I might try and be a bit more organised and wrap my presents before putting them in gift bags. Naturally, I thought of making my own wrapping paper, and here's one way I'll be making some of my wrapping paper this year.


I wanted this wrapping paper to look a bit different to the normal, conventional wrapping paper you see in the shops. I wanted something a bit more striking, and the idea hit me to make one out of a wordsearch featuring Christmassy words.

You'll need to use a free wordsearch generator on the web (there are gazillions out there) and type in as many festive words as you can dream up. Then print it out. This wrapping paper is better for tinier (but more expensive) presents, unless you have an A3 printer, and then you can go mad and use it on everything.


Then use scissors to cut out the wordsearch part of your paper.


Use brightly coloured pens to highlight some of the words in the wordsearch. Until doing this, I had forgotten how bad I am at doing wordsearches.


Now the final step - wrap your presents!


And you're finished! I'll be using this to wrap the more tinier of my presents, especially small pieces of jewellery and makeup.

Let me know if you try this, or if you have any more ideas for handmade wrapping paper - I'd love to hear them!

Wednesday 11 December 2013

Mid-Week Treat: Gel Eyeliner for Under £5!

So recently, I lost my eyeliner. I've been overturning everything looking for it, but no such luck and therefore I've been without my beloved eyeliner for the past week (such a first world problem, I know). I gave up the hunt yesterday, and decided to cave in and buy some new gel eyeliner. I didn't want to spend too much though, just in case my old one decided to turn up out of the blue.


This is what I bought; 17's Smoulder Gel Eyeliner - a steal at £3.99, considering that the others were at least double that price.


For that price, I was doubtful whether it would be as good as my faithful old gel eyeliner, but I am delighted to be proved wrong. I tried it out today - it was easy to apply, stayed in place all day and has a lovely smooth consistency. It also comes with perhaps the cutest, tiniest brush I've ever seen (it's so dinky!).


It's fair to say that this gel eyeliner has cemented it's place in my make-up case.

Any eyeliners that you particularly love at the moment?